How to Install an Additional M.2 SSD on the PlayStation 5
Expanding your PlayStation 5’s storage capacity with an additional M.2 SSD is a great way to accommodate more games and apps without compromising performance. This guide will walk you through the process of selecting a compatible M.2 SSD and installing it in your PS5.
Important Note: Before proceeding, make sure your PS5 system software is updated to the latest version, as M.2 SSD support was introduced in a recent update.
Table Of Contents
1. Choose a Compatible M.2 SSD
The PlayStation 5 requires an M.2 NVMe SSD with a PCIe Gen4 x4 interface. The SSD must meet the following specifications:
- Sequential read speed of 5,500 MB/s or faster.
- Form factor: M.2 2230, 2242, 2260, 2280, or 22110.
- Cooling structure (heatsink) that meets Sony’s size requirements.
Consult the PlayStation 5 user guide for a detailed list of compatible SSDs and cooling structures. You can also check our PS5 SSD compatibility tool to find out if your SSD will work.
2. Gather the Necessary Tools
To install the M.2 SSD, you’ll need:
- A Phillips-head screwdriver (size PH1 or PH0).
- A soft cloth or mat to protect the console’s surface.
- A compatible M.2 SSD with a cooling structure.
3. Power Off and Unplug Your PS5
- Turn off your PlayStation 5 by pressing and holding the power button until you hear two beeps.
- Unplug all cables, including the power cable, HDMI cable, and any accessories.
4. Remove the PS5 Side Cover
- Place your PS5 on a soft cloth or mat with the disc drive facing down.
- Locate the side cover with the PlayStation logo.
- Place your hands on the top-left and bottom-right corners of the cover.
- Gently lift the cover while applying a slight push inwards to release the cover’s hooks.
- Carefully slide the cover off.
5. Install the M.2 SSD
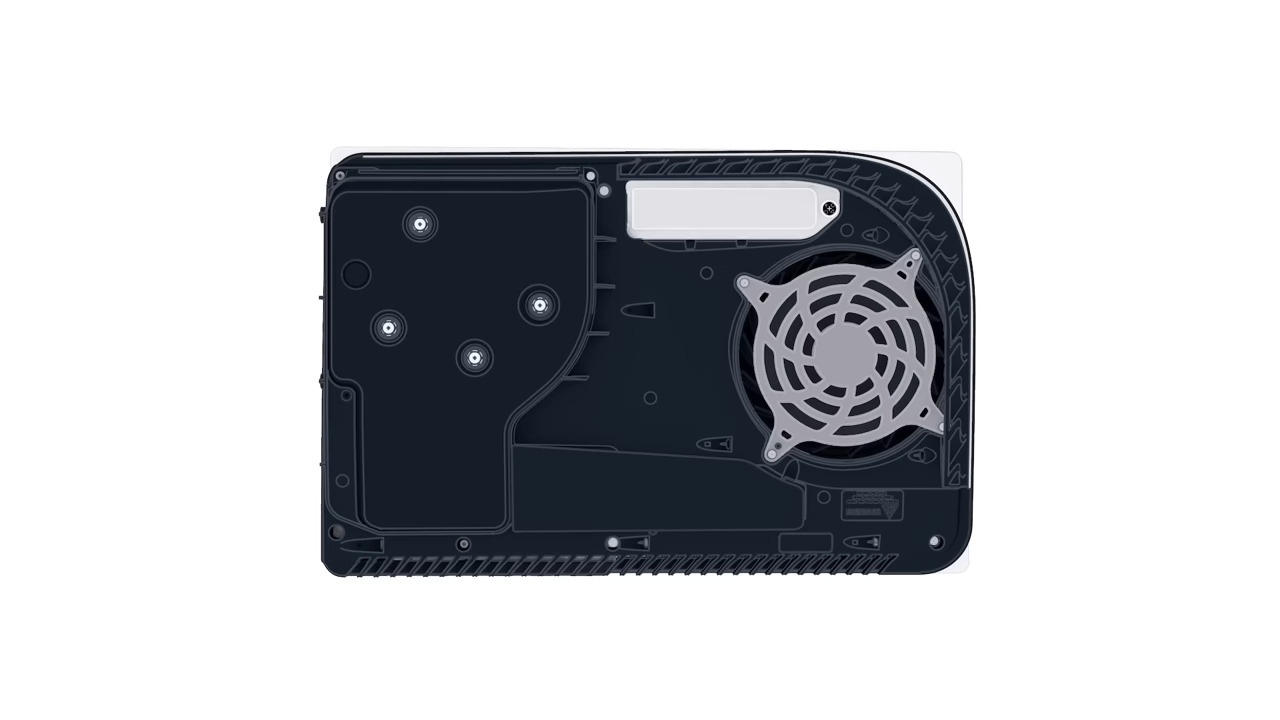
- Locate the M.2 SSD slot, which is covered by a metal plate secured with a single screw.
- Use the Phillips-head screwdriver to remove the screw and lift the metal plate.
- Identify the appropriate screw hole for your SSD’s form factor (2230, 2242, 2260, 2280, or 22110).
- Unscrew the small screw and spacer from the original hole, and reposition them in the appropriate hole for your SSD.
- Align the notches on the M.2 SSD with the notches on the SSD slot.
- Insert the SSD at a 30-degree angle, making sure it’s firmly connected.
- Gently press the SSD down and secure it with the small screw you repositioned earlier.
6. Reassemble Your PS5
- Place the metal plate back over the M.2 SSD slot and secure it with the screw.
- Align the side cover’s hooks with the PS5’s slots and gently slide it back into place.
- Press down on the cover until it clicks securely into position.
7. Set Up the M.2 SSD on Your PS5
- Reconnect all cables and power on your PlayStation 5.
- The system will automatically detect the new M.2 SSD and prompt you to format it.
- Follow the on-screen instructions to format the SSD and make it available for use.
That’s it! You’ve successfully installed an additional M.2 SSD on your PlayStation 5. You can now enjoy the expanded storage capacity for your games and apps.


