Having a strict NAT type can have a big impact on your ability to communicate effectively with Xbox live. The exact detail of what NAT means matters little. All you need to know is that if you have a strict NAT type and intend on using Xbox Live, you will need to work on fixing this to get an open NAT on your Xbox Series X and Series S.
Common issues you might experience with a strict NAT type are connection issues joining parties or the highly frustrating LAG/echo when speaking to other players. There may also be issues with download speeds and your ability to join other players in online games. It is highly recommended that you follow the guide below to get an open NAT.
Table Of Contents
Getting An Open NAT On Xbox Series X and Series S
To fix the issue with your NAT being strict, you will need to navigate to the settings menu of your Xbox console. The menu is the exact same for the series X and the series S, so you will not need to worry about this being different if you are on a different console. In fact, at the time of writing this, you can also use this guide to configure it on the Xbox One.
The first thing you need to do is to navigate to the network settings on the Xbox. This is found under the following navigation tree.
General -> Network Settings -> Advanced Settings -> IP settings
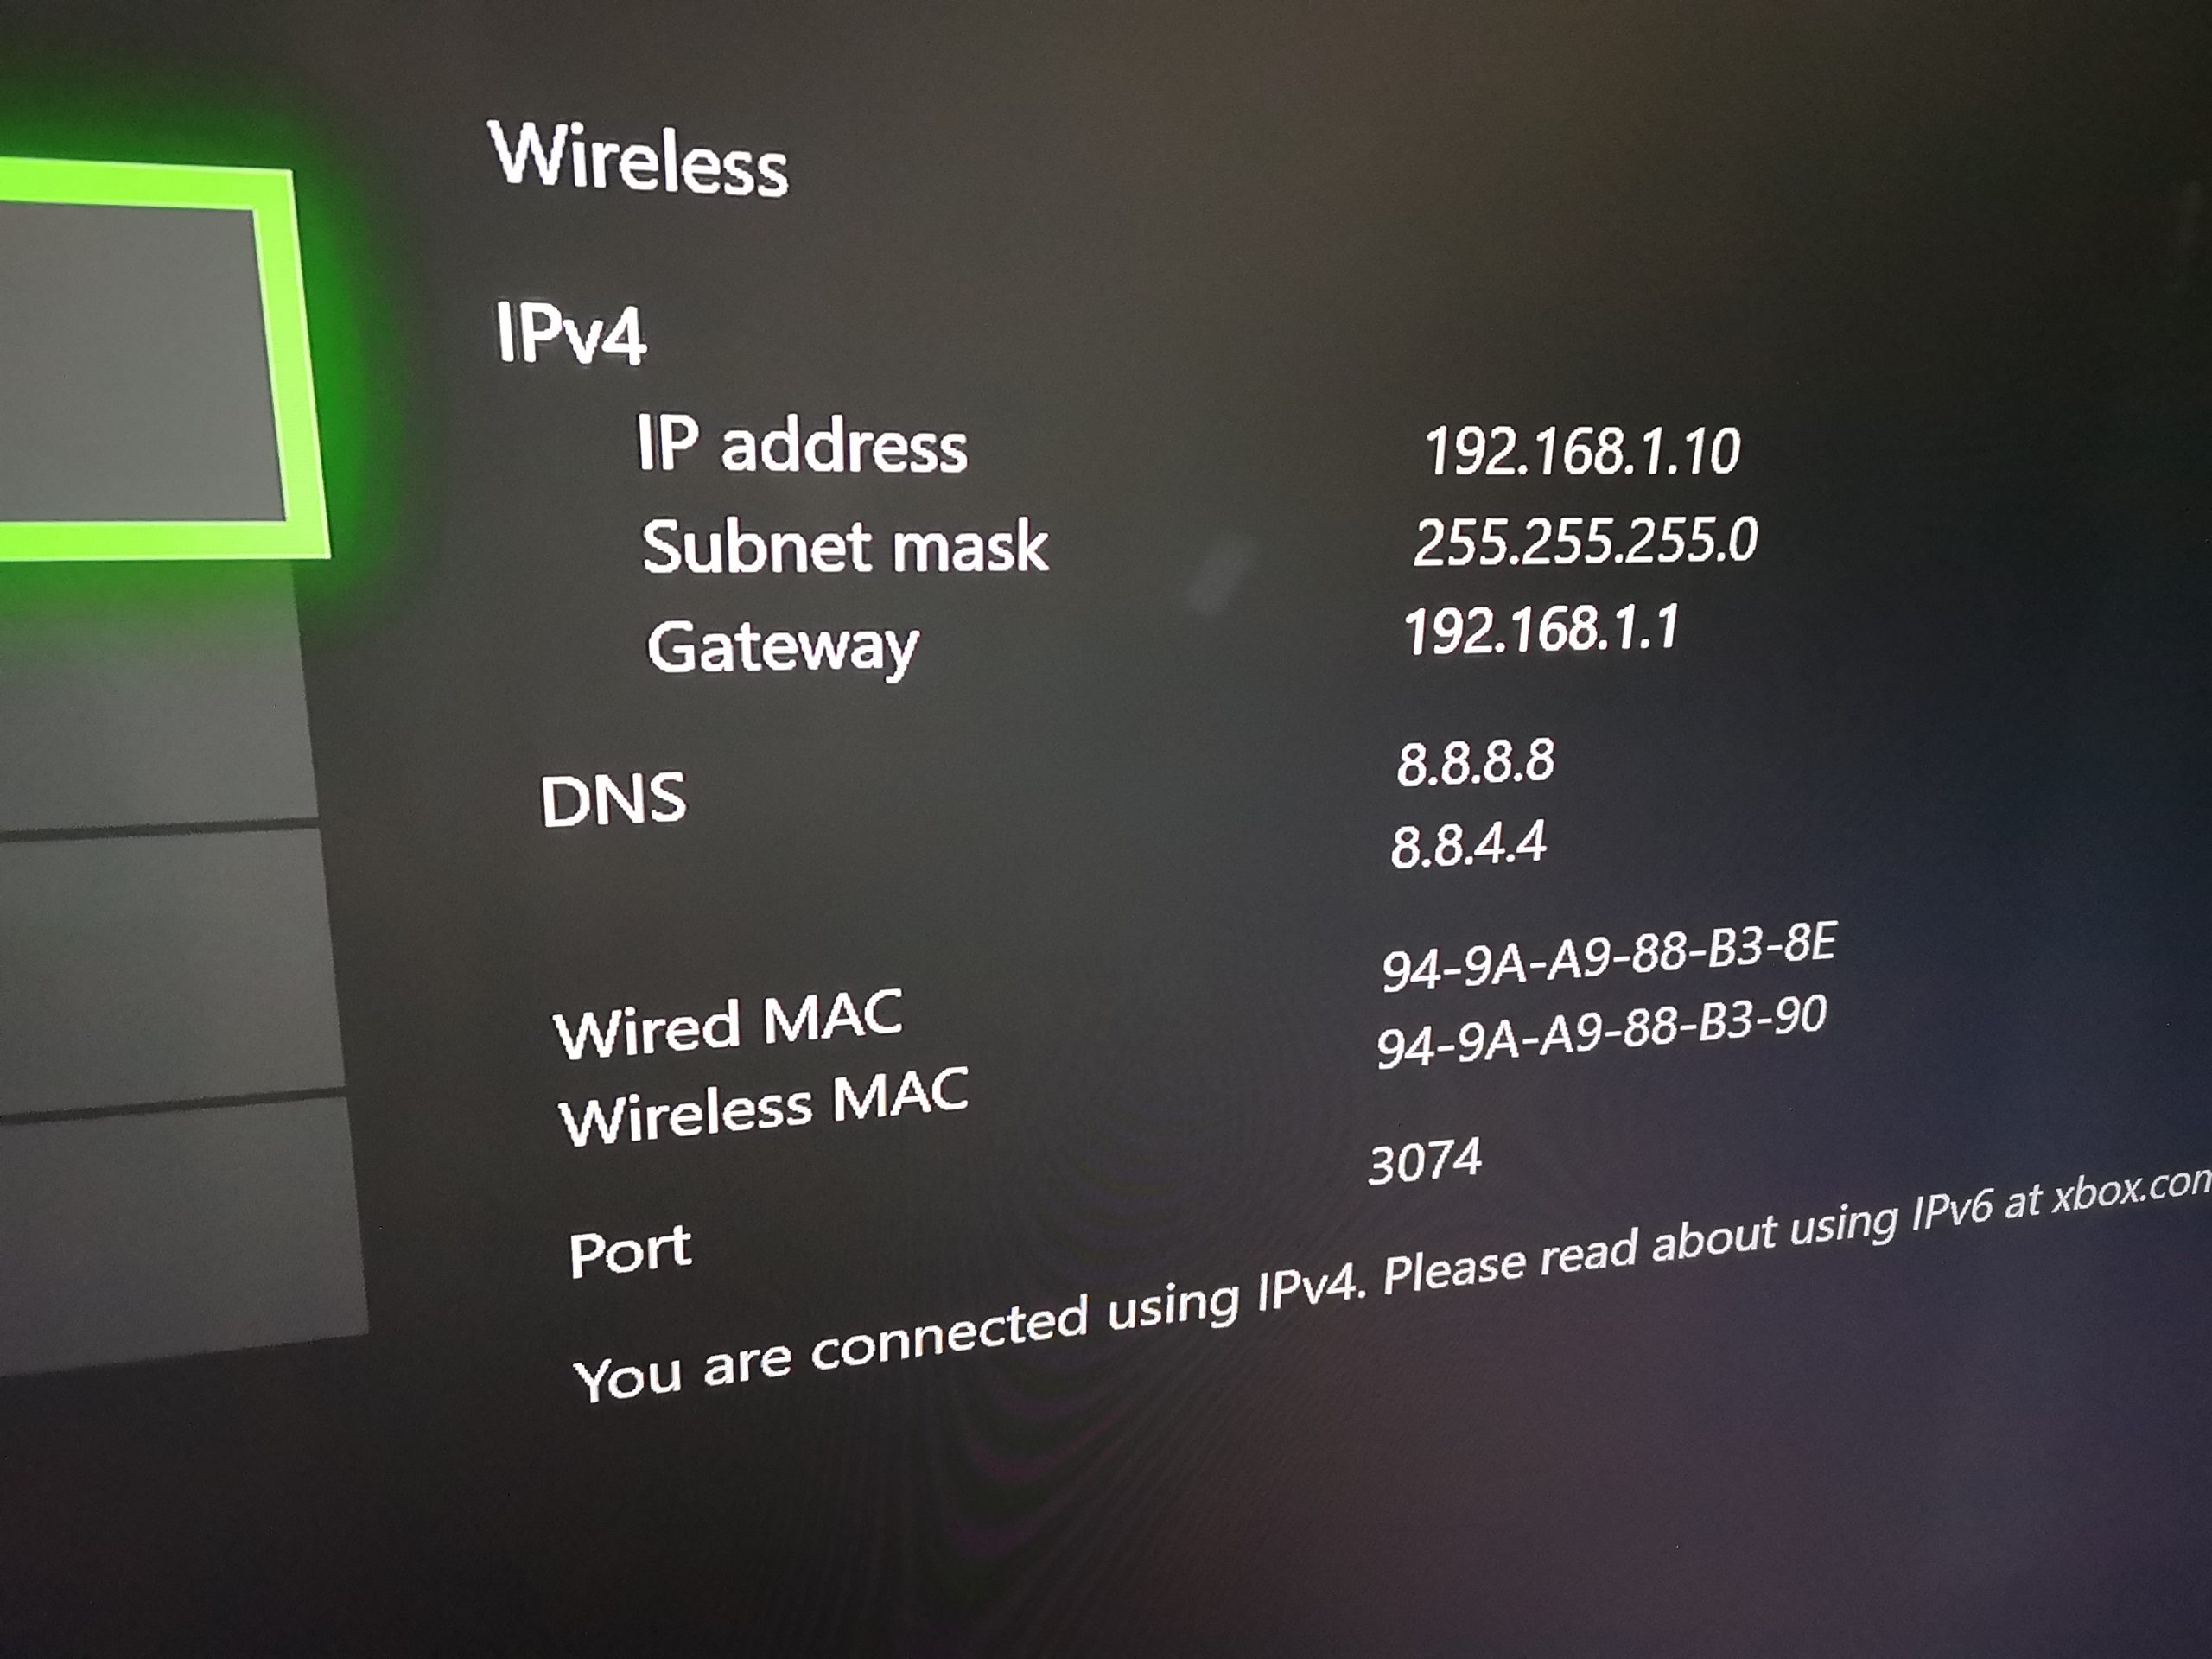
Once you are here, take note of the current settings. You will need to reuse some of this when manually inputting the information.

Manually Set IP Settings
Select the option for IP settings and you will see the option for manual and automatic. You will need to change this to manual. The reason for this is that if you select automatic, your console will get a different IP address every time you connect to the internet. In order to have an open NAT, you will need to make sure your Xbox always uses the same IP address. This is done by setting the IP manually.
You should have taken note of the information that you can see in the image above. When manually entering the information that is requested, you will be able to use the values here. The only recommendation I would make is to use an IP address with a larger number in the 4th section.
In the example above, I would take the current automatic IP of 192.168.1.10 and change it to something higher like 192.168.1.100. There is a very low chance that you will have 100 items connected to your home network that would cause this address to ever get used. If you are familiar with your router, you could also remove this IP from the DHCP pool, but this is a little more advanced so it is fine to just set a higher number at the end to avoid this issue.
Once you have completed this wizard, you are all done. Your Xbox Series X or S is now using a static IP.
Open Xbox Live Ports On Your Router
This step is unfortunately the step that most people will find difficult. Every brand of router will have its own interface and network address, so it is not possible for me to provide specific instructions. I will try to provide generic instructions here that will give you enough information to know what you need to do.
The action you need to perform is called “port forwarding”. This is where you will set the security on your router to allow communication through a certain location known as a port. By default, these ports will be blocked. Routers all have a different way of doing it but they all do the same thing under the hood. You will need to find out the brand of router that you are using and perform a google search for “{router name} port forwarding”. This will give you the instructions you need.
Xbox Live Port List
The following list of ports will need to be open. Start with the first port 3074. Typically, this is the only port people need to open in order to achieve an open NAT type. If it does not work, keep opening more until everything is working for you.
- Port 3074 (UDP and TCP)
- Port 53 (UDP and TCP)
- Port 80 (TCP)
- Port 500 (UDP)
- Port 3544 (UDP)
- Port 4500 (UDP)
- Port 88 (UDP)
Testing NAT Type
IF you go back out of the IP settings menu, you will see there is a test to check your NAT type. The system will often run the test automatically when you hit the menu, but it doesn’t do it every time. After you have made some changes to the open ports on your router, you can run the test from the network menu and it will let you know what the current status is. If you run the test and it now says open, your job is done and you will be able to enjoy a better experience with Xbox Live.


And if it doesn’t say open your forwarded all the ports properly and it’s still strict?
I’d you have opened all the ports and still says strict you may have opened them for the wrong IP. Restart the console if you are sure you did it right on the router
Didn’t work I’ve done everything right