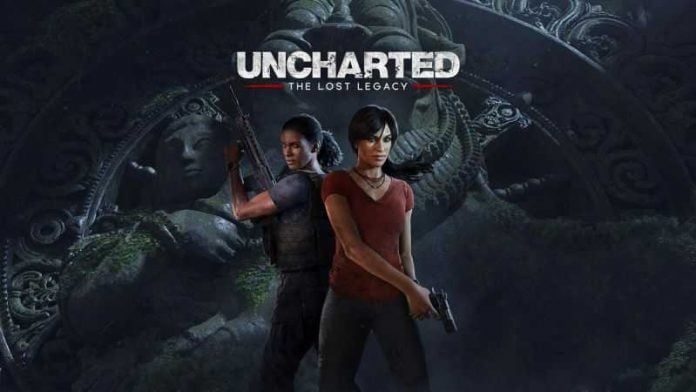
Uncharted The Lost Legacy has its share of collectible items like all past Uncharted games have had. You will find a lot of them without trying, but for the more difficult ones, this guide will help. There are 145 collectible items in total to find in The Lost Legacy which break down as follows.
- 68 Treasures
- 28 Photos
- 21 Lockboxes
- 17 Optional Conversations
- 11 Holsaya Tokens
There are individual trophies assocoated with collecting a certain amount of each particular item. There is also a trophy for collecting all of each collectible meaning you will need to find everything if you want to go for the platinum trophy. This collectible guide for Uncharted The Lost Legacy will cover everything you need to know to obtain all of the collectible items in the game.
There are 9 chapters with a prologue and epilogue making a total of 11 distinct sections of the games story. There is a collectible tracker in the chapter select menu which will help you keep tabs on your progress and more importantly, help you figure out where an item is if you happen to have missed one. The video guides below by PowerPyx will show all of the item locations broken down by chapter. I have added a text description below each video to give a description on the item location for anyone who needs it, but It is no use without the video to show you where to go.
Prologue
1 Treasure, 1 Photo
Photo #1 – Take a picture of the little girl and the vases on the right side of the market. Walk up to the vases and you will be able to take the picture.
Treasure #1 (Ganesh Figurine) – You will get this automatically after the little girl steals from you.
Chapter 1
1 Treasure
Treasure #2 (Sterling Silver Cigarette Case) – On the rooftop of the red house, on top of the barrels.
Chapter 2
5 Treasures, 1 Photo
Photo #2 – At the start of the chapter, walk up to the Pink Lotus Sign and it will let you take a picture of the thugs on the street.
Treasure #3 (Bullet Whistle) – At the grapple point of the first zipline, do not go down the zipline. Look to the right and you will see it on a ledge, hidden behind a shed.
Treasure #4 (Military Service Lighter) – After going down the first zipline from the previous point the treasure will be on top of a shed. You need to pull out a crate in order to climb up on top of the roof.
Treasure #5 (Utility Spork) – Directly after treasure #4, you will obtain a second crate to push down to Nadine which will collapse the roof. You will find the treasure on the crate. Push the crate back and the boxes on top will fall off. The treasure will be there when the boxes are out of the way.
Treasure #6 (Travelling Inkwell) – After you pass over a wooden beam you will reach a room with a purple light inside. Inside this room on the left is a table and the treasure will be on top of it.
Treasure #7 (Tactical Compass) – During the story, Natine will smash a window in a cutscene. Once the scene has ended, head into the next room, there will be some wooden crates next to a window with a treasure.
Chapter 3
4 Treasures, 3 Photos, 1 Lockbox
Photo #3 – During a cutscene a “nice view” will be brought up. You can take a picture of this.
Photo #4 – You will find this photo op on the left side of the cliff before dropping down to the flamingo convention.
Treasure #8 (Gupta Empire Coins) – In the water at the flamingo section, you will find this behind a rock that acts as a ramp.
Treasure #9 (Silver Water Jar) – During the story, you will get to a door that you need to pull down using the trucks winch. Climb the ledges on the left and you will be able to see the treasure through a hole on a broken wall. You can destroy this wall using a grenade.
Treasure #10 (Golden Fish Statuette) – Moving on from the previous treasure and driving through an open gate, you will get to a point where you cross a small bridge into a tunnel. Before this point there is an area with waterfalls and you will find the treasure between 2 of the waterfalls near some trees.
Photo #5 – You will get to a point with a large battle that has a lot of enemies. After killing them all you will need to open the door for Natine. In the lower area where there are 2 enemies patrolling around, on the left side, you should see a photo icon. It doesnt appear until the enemies are dead.
Lockbox #1 – This is found on one of the enemy trucks in the same area as photo #5.
Treasure #11 (Mango Crystal Scent Flask) – Once you have opened the large door Nadine, you need to drop down on the other side of the door and you will see the treasure on the left side of the door after climbing down.
Chapter 4
19 Treasures, 9 Photos, 4 Optional Conversations, 11 Lockboxes
A lot of these are in locations that you might not visit through the progression of the story since it is an open world section that you can explore as you please. The video guide will show you the location on the map before each one. The text below will help you find the item once you have reached the map location marked in the video, but there really isn’t any way for me to add a text guide for this section of the game without having to heavily rely on the visual markers from the videos.
Photo #6 – Get out of the car at the start of the chapter. Go to the edge of the cliff and look at the towar in the distance.
Hoysala Token #1 – There is a temple in the north east corner of the map. Interact with the shrine inside to open a door on the left. The token can be found inside here.
Hoysala Token #2 – Use your rope to open the lid on top of the ruin.
Lockbox #3 – After getting the previous token, enemies will arrive. The lockbox is on the back of an enemy truck. The truck only shows up after entering the cave.
Hoysala Token #3 – There will be a series of 6 bells that you need to shoot to open a hidden door. Climb the wall next to the snake statue and shoot the bell here and the remaining 6 below and the door will open.
Hoysala Token #4 – Fairly simple, make your way over to the cave on the other side of the tower and the token is inside.
Hoysala Token #5 – You can find a grenade nearby in the lockbox if you need to resupply.
Hoysala Token #6 – Simply use the ropes and use this as a chance to get the Tarzana trophy.
Hoysala Token #7 – If you want to save your grenades, use the propane tank to blow up the wall.
Hoysala Token #8 – There is a diving hole next to the elephant statue and the toking will be at the end of the path.
Hoysala Token #9 – Interact with the fish statue to behin a puzzle. Step on all of the fountains and the fish will give you the token once you do it.
Hoysala Token #10 – The token is in a lockbox in front of the cave.
Hoysala Token #11 – Awarded for solving the plate sliding puzzle.
Photo #7 – Once you have all the Hoysala tokens, return to the shrine where you found #1. You will see an island with monkeys on it before entering the shrine. You can take a picture of these monkeys.
Optional Conversation #1 – Straight after photo #7, go into the shrine and return all of the tokens. It will open up and let you go over to the island with the monkeys from the previous picture. You are able to interact with monkeys on a pillar in the corner. This will trigger a conversation about monkeys and bananas.
Photo #8 – On the same island with the monkeys where you just had the conversation, go to the cliff facing the shrine entrance. You can take a picture of the monkeys jumping on Nadine.
Treasure #12 (Inscribed Copper Plate) + Treasure #13 (Silver Goblet) + Treasure #14 (Hoysala Kukri) – This one is nice and handy, 3 for the price of one! They are all together in the ruins on the same island with the monkeys from the past 3 collectibles.
Lockbox #2 + Treasure #15 (Miniature Bronze Cannon) – Another multi win, the treasure is inside the lockbox.
Treasure #16 (Jade Archer’s Ring) – On the tower.
Treasure #17 (Hoysala Coin) – The treasure is in the elephants eye.
Treasure #18 (Ivory Casket) – Drive up to the cliff with your car and the treasure will be near a tree there.
Treasure #19 (Stag Horn Box) – Behind the pillar after sliding down the mud to the rock ledge.
Optional Conversation #2 – Look at the trident above the entrance to the fort and this will allow you to have a conversation with Nadine.
Lockbox #4 – After completing the puzzle in the fort with the trident from conversation #2, enemies will start arriving. Kill them and make your way to a truck that is up by the top of the waterfall. The lockbox is on the back of this truck.
Treasure #20 (Trinket Box) – On the south side of the waterfall area near the location of lockbox #4 you will find a passage for the car to get past the waterfall. There will be a treasure on a stone that you can pickup.
Treasure #21 (Ancient Stone Jar) – Go down the waterfall and climb onto a small rock at the bottom, the treasure is on top.
Photo #9 – Take a pic of the waterfalls from the location on the map in the video.
Treasure #22 (Medieval Indian Lock and Key) – This treasure can be found on top of a ledge on the southern side of the ruins. Climb up the ledge to grab the collectible.
Treasure #23 (Rosewood Spice Box) – The side path off the road to the tower.
Lockbox #5 – Easy to find after killing the enemies. Make sure you save the grenade inside.
Photo #10 – You will have obtained a grenade in the previous lockbox (#5). Use this to blow up the broken down all to the left of the lockbox. Investigate the trident statue for a photo op.
Lockbox #6 – You will see the lockbox at the top but the slippy mud prevents you getting up there. Turn around and climb on top of the rock, this lets you swing over to the lockbox and collect it.
Photo #11 – This can be a tricky one to trigger. Stand slightly to the left of the front of the statue and it will give you the chance to take the picture.
Photo #12 – Take a pic of the archers fort from the location on the map in the Uncharted The Lost Legacy collectible guide chapter 4 video.
Lockbox #7 + Treasure #24 (Leather Covered Binoculars) – Another handy combo. The lockbox in the middle of the enemy camp contains the treasure.
Lockbox #8 – Next to a truck before entering the archers fort.
Optional Conversation #3 – After lockbox #8, check the archer symbol above the entrance and interact with it. This will allow you to talk with Natdine.
Lockbox #9 – There is a locked gate with a bridge at the top of the archers fortress. The lockbox is underneath the bridge.
Treasure #25 (Engraved Gourd Jar) – Underneath the bridge by the water.
Treasure #26 (Serpents and Ladders Game) – Check the stairs near a bridge inside the cave and you will find the treasure.
Lockbox #10 – Simple to find based on the video. The lockbox is on the back of a truck.
Lockbox #11 – Same as lockbox #10, near a trick behind a tower.
Treasure #27 (Nagfani Horn) – Next to the tree shown in the video.
Photo #13 – Stand next to the tree by the waterfall and look at it for the photo op to trigger.
Treasure #28 (Jade Pendant) – Found after climbing to the top of the ruins.
Lockbox #12 + Treasure #29 (Butterfly Trinket) – The treasure is in the lockbox!
Treasure #30 (Metal Tiger Claws) – Inside the dark cave before the axe fort.
Optional Conversation #4 – Before you go into the axe fort, examine the symbol above the entrance and it will allow you to talk with Nadine.
Photo #14 – After the first axe trial, you can look down the cliff and take a picture of the view.
Chapter 5
6 Treasures, 4 Photos, 5 Optional Conversations
Optional Conversation #5 – Nadine will tell you that she has found some stairs after dropping down from the ledge.
Treasure #31 (Padouk Tea Caddie) – Check the edge of the cliff after the previous conversation, #5.
Photo #15 – Take the photo of Ganesh shown in the video.
Treasure #32 (Engraved Ewer) – After the previous photo ,#15, climb to the top of the ledge that you see when swinging on the rope.
Optional Conversation #6 – This will happen when you grab Nadines hand while climbing on the Ganesh monument.
Photo #16 – Take a pic after climbing to the top of Ganesh once the cutscene is over.
Optional Conversation #7 – Inspect the cannonball after climbinb Ganesh. This will allow you to talk with Nadine.
Treasure #33 (Bidri Hookah Bowl) – This treasure is in the corner behind the elephant statue after using the rope to get back down to the bottom of Ganesh.
Photo #17 – This is behind the previous treasure, #33.
Treasure #34 (Gold Cased Ivory Dentures) – After the area where you got the previous 2 items, crawl through the hole in the wall. After coming out the other end, the treasure will be on the left side of the room.
Optional Conversation #8 – This conversation will trigger after going bass the big wheel doors when you get to a lantern that is lighting itself.
Treasure #35 (Palm Leaf Manuscript) – In the left corner of the room that contains a bunch of skeletons and 2 burning lanterns in the middle.
Treasure #36 (Khanjarli Curved Dagger) – After completing the scene where you are being chased by an armored car, drop down and check the corner of the dark room that you find yourself in.
Optional Conversation #9 – After sliding down the waterstream you can talk with Nadine after she talks about Avas being a doctor.
Photo #18 – Don’t interact with the wheel or lever in this area or it will invalidate the opportunity. Go to the right of the gate and the photo op will be on the other side.
Chapter 6
5 Treasures, 2 Photos, 1 Optional Conversation, 3 Lockboxes
Lockboxes #13 & #14 – These are both in the same area. The part where there is an APC patrolling around the place. The first can be found on the right hand side of the area through a small building and the other is on the left side of the area.
Treasure #37 (10th Century Oil Bottle) – Once you have opened the entrance to the holy cow, walk down the stairs, follow the corridor and turn right. The treasure will be on the stairs here.
Treasure #38 (Aged Silver Anklet) – After crawling through the tunnel with the bats, go right and up the stairs. Turn left at the top of the stairs and you will find the treasure.
Photo #19 – Take a photo of the group of elephants once the cut scene has ended after the elephant ride.
Treasure #39 (Ceremonial Sugar Hammer) – You will find this in the right corner where the elephants are.
Optional Conversation #10 – After the elephants, wait around after climbing up the step where you need to go to progress with the game. After a short wait you can talk with Nadine about elephants.
Lockbox #15 – You will come across this after moving on from the elephant area.
Photo #20 – Climb up from the area where you got loxbox #15 and you will have the photo op.
Treasure #40 (Agate Gemstone Box) – From the previous photo op, #20, turn around and swing over to the ledge across from you and the treasure will be there.
Treasure #41 (Raja Raja Gold Kahavanu) – In the same location as the previous treasure, swing to the ledge where there is a cave entrance and you can collect the treasure inside.
Chapter 7
16 Treasures, 7 Photos, 3 Optional Conversations, 1 Lockbox
Photo #21 – This is at the very start of the chapter directly in front of you.
Lockbox #16 – After the first enemy encounter of the chapter, you will find this up on top of a balcony. It is fairly easy to see as you go through the level.
Treasure #42 (Lakshmi Marriage Ornament) – After the big fight with a bunch of enemies, progress on and you will enter a small tunnel that has caved in with a bunch of stones blocking the way. Exit this save and turn right. The treasure is on the ledge after you jump over.
Treasure #43 (Hanuman Brass Bell) – Go to the back of the alter after reaching Balur.
Treasure #44 (Enameled Betel Box) – Sitting next to a tree in the room that contains a well.
Treasure #45 (Jeweled Pipe Mouthpiece) – After the diving section there is a small passage on the left side of the room. Dive down and you will find the treasure underneath the water.
Photo #22 – After the diving section, the photo op will be on the left side of the stairs.
Optional Conversation #11 – This will trigger after taking photo #22.
Treasure #46 (Handcarved Sheesham Breadbox) – This can be found in the final closet on the left side of the library.
Treasure #47 (Silver Comb Perfume Flask) – Behind the shelves at the back of the library.
Photo #23 – After following the path after the library cut scene, the treasure will be on the cliff directly in front of you.
Treasure #48 (Bronze Deccan Incense Burner) – After jumping off the cliff into water, you will find the treasure on the left side of the room after diving under the water.
Treasure #49 (Satavahana Hourglass) – After completing the diving puzzle where you must remove branches, go into the next room and the treasure will be at the very end.
Photo #24 – In the same room as treasure #49, climbing up will give you the photo op.
Photo #25 – Swing over to the fountain and take a pic of the statues from here.
Treasure #50 (Chalukya Griffin Candlestick) – Check the corner at the rear left of the room for the treasure.
Photo #26 – You can take a photo of the Shiva statue after a swimming section.
Treasure #51 (Bronze Medallion Flask) – Dive behind the rock on the left side of the room after leaving the room with the big Shiva statue.
Treasure #52 (Bichwa Dagger) – In front of the statue in the same room as treasure #51
Treasure #53 (Jadeite Bottle) – In the corridor on the right side of the statue room.
Treasure #54 (Harappan Ivory Dice) – Climb up the left side of the room where you found treasure #53. There will be steps on the left and the treasure will be at the top.
Optional Conversation #12 – After you use the crank to move the lower right hand on the Shiva statue, you will get the chance to talk before you jump on the hand.
Treasure #55 (Ivory Chess Pieces) – After climbing on Shiva’s second left hand, jump onto the ledge with the crank and you can collect the treasure from the balcony below.
Treasure #56 (Gold Chola Earrings) – On the back of the ledge in the area with the second crank for the Shiva statue.
Treasure #57 (Bridal Maang Tikka) – Once you reach the 3rd and 4th wheel on the opposide side of the room, drop down from the ledge and the treasure is on the pillar near the stairs.
Optional Conversation #13 – After moving the first statue around in the room with the prism riddle, you will be able to speak with Nadine.
Photo #27 – While Nadine is using the mirror from the broken statue, you will be able to take a picture of her with the mirror.
Chapter 8
8 Treasures, 1 Photo, 4 Optional Conversations, 5 Lockboxes
Optional Conversation #14 – By the cliff at the very start of the chapter.
Treasure #58 (Jeweled Snuff Bottle) – Check the ledge on the cliff at the start of the chapter.
Treasure #59 (Brass Ewer) – After dropping down the ledges on the cliff, you will see a waterfall. You will find the treasure when you dive into the water.
Treasure #60 (Mamluk Brass Bowl) – Exit the cave behind the waterfall and jump to the ledge on the right side. The treasure will be at the end of the path after you climp up.
Treasure #61 (Crescent Flask) – In the right hand corner of the area with the iron fence.
Optional Conversation #15 – In the same area as treasure #61.
Optional Conversation #16 – Talk with Sam after the he makes the jump from the railway car, breaking his glasses in the process.
Treasure #62 (Soapstone Jewelry Box) – When you give Sam your rope, go left after sliding and instead of using the rope that Sam throws down for you, climp up to the treasure.
Optional Conversation #17 – After reaching a gap you have to progress through with pressing triangle and then removing a wooden beam from the collapsed exit, you get the conversation.
Photo #28 – Take a picture of the train after you reach and break a railway bridge. You can take the pic after climbing your way back to safety.
Treasure #63 (Peacock Nut Cutter) – After taking Photo #28, drop down to the ledge you saw in the picure and the treasure will be there.
Treasure #64 (British Powder Flask) – After Sam breaks a ladder and throws down a crate to climb up on, go through a cave on the right instead of going up the bridge. You will reach the point where Sam broke the ladder and will find the treasure here.
Treasure #65 (Strange Skull) – Chloe has a converstation about which persons rope Sam will use. Turn around and swing back to the ledge below you and you will find the treasure.
Lockboxes #17 & #18 – On the right side of the helicopter area.
Lockbox #19 – At the back of the same area with the helicopters.
Lockbox #20 – In a building on the left side of the same helicopter area as the previous 3 lockboxes.
Lockbox #21 – In the middle of the area you will see a train. The lockbox is under the bridge where the eneimes are.
Chapter 9
3 Treasures
Treasure #66 (United India Company Pistol) – On top of the first train cart at the start of the chapter.
Treasure #67 (Viceroy’s Penbox) – At the back of a cart that Nadine says cant be climbed.
Treasure #68 (United India Company Coins) – Check the 3rd train cart after you complete the driving sequence and get back to the train.
And there you have it, the complete collectible guide for Uncharted The Lost Legacy. All of the credit needs to be given to PowerPyx for creating the brilliant video guides. You can find a bunch of other video guides for this game and many other games on his Youtube channel .


