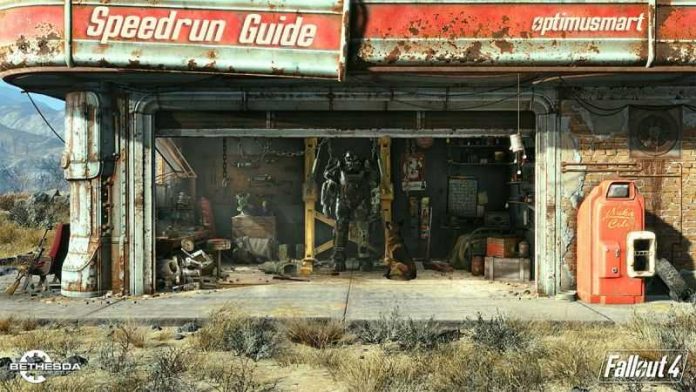
Guide By Optimusmart
The game does provide you with some minor TUTORIALS early on, mainly the first time you perform a certain action, make sure you read these carefully so you understand the game and because the TUTORIALS will only appear once.
Levelling
Almost every action in the game, rewards you with XP. As you earn XP, you will level up and the amount of XP required to level up increases with every level.
When you level up, you will gain a point that you can use in the S.P.E.C.I.A.L Perk chart. Each Perk will give you certain bonuses, so normally you would choose wisely, but I have done that for you and saved you the trouble ;)!
Pipboy
The PIPBOY is a item that you discover in the first area in the game and this is basically your little Portable Device that allows you to check various information regarding the game.
You use this to;
- View the Map which allows you to warp, check Settlements etc
- Equip/Unequip/Organise anything you collect; Weapons/Armour/Junk etc.
- View Quests, select/deselect Quests.
- View the S.P.E.C.I.A.L tree so that you can apply Levelling points.
- View your stats
- Change RADIO stations
- It also has a light that you can use to illuminate the area in front.
Thats the majority of what it does, but it does have other uses.
Carrying Capacity
This is a right pain early on.
Everything you collect has a Weight (well most, but AMMO does not) and this adds to your Total Carrying Capacity.
Once your Carrying Capacity is full, you will become very slow and unable to Warp.
Your Companion can carry Items, so transferring some of your Items to them to lift the Burden is sometimes neccessary. Once you warp back to your main Settlement, you just transfer the items back across and then deposit them in your Workbench.
Certain Apparel/Armour and Perks increase you Carrying Capacity but perhaps don’t help that much because when your at that point where you can really begin to gain the maximum benefits from these, you wont be Looting anymore.
Looting
Looting is a very important aspect of this game. Looting eventually leads to you earning CAPS in the game which is the source of currency. Looting also allows you to acquire specific materials which is collectively known as JUNK.
Different types of JUNK are needed to Craft which is another very important aspect. I will tell you when to LOOT and when not so don’t worry to much about this.
Bobbleheads & Mags
Bobbleheads are small figurines you collect that give you a permanent Bonus. For example, you may receive a extra S.P.E.C.I.A.L point or you may even receive a boost in Melee damage. There are 20 Bobbleheads in the game and you must find all these for a Trophy so I will guide you to there locations anyway.
Magazines are similar to Bobbleheads but provide a much smaller Bonus. There are also a 100 or so Mags to collect, but I will guide you only to 20 because only 20 are needed for a Trophy.
Picking Locks & Hacking Terminals
LOCKS
Throughout the game you will come across various Locks that need Picking, like Doorlocks or a Toolbox for example. 50 Locks need picking for a Trophy and some Locks can’t be Picked until you have upgraded the LOCKPICK Perk. You also need BOBBYPINS to Pick a Lock which are something you Loot.
Once you begin to Pick a Lock a small sequence begins in which you have to rotate the Analogue sticks carefully to Pick the Lock, this will be explained in game. I will not tell you exactly where to find all 50 Locks, you will just Pick Locks you come across as you play and you will manage 50 Locks easily.
TERMINALS
Throughout the game, you will come across various Terminals that need to be Hacked, 50 for a Trophy to be exact. Again, you can’t Hack some of these until you have upgraded the HACKER Perk. 50 also need Hacking for a Trophy.
These are actually harder to come across than Locks, so I will guide you to these in the Guide.
When you begin to Hack the Terminal, there will be soem possible passwords on the Monitor, you need to select the correct password. When you select a incorrect password, the Terminal will tell you if any letters of that password are in the correct password thus giving you a clue. This is helpful in Novice Terminals, but doesn’t help much in Master Terminals.
You get a certain amount of attempts to crack the password, as shown on screen. When you only 1 attempt left ALWAYS exit the Terminal and activate again as this resets your attempts, but unfortunately also resets the passwords. NEVER use ALL attempts at once as this will Lock you out, sometimes temporarily, sometimes permanently, don’t risk it.
To be honest, I found the best way is to just quickly select 3 options, then exit and enter again, select 3 more then exit and enter again. Just repeat this until you select the correct password, its quicker than having to keep stopping and work out what the password may be, especially on the difficult Temrinals.
Terminals are also used for viewing Holotapes, JUST MAKE SURE you view the in-game Tutorial for these.
Crafting
Everything you Craft requires Junk that you Loot, upgrading your Weapons all the way to creating Furniture in a Settlement.
When you craft, Junk will automatically be broken down into smaller parts automatically, the PIPBOY shows what parts can be salvaged in the JUNK menu.
Crafting is mainly performed at Benches. For example, to upgrade a Weapon you will use a Weapons Bench, to upgrade your Armour you will use a Armour Bench etc.
Benches are all placed via your Workshop Menu from within a Settlement you have acquired which brings me onto the next point.
Settlements
These are small locations you acquire that allow you to provide a Livable area for Settlers.
Settlements also allow you to create and place Furniture via the Workshop HUD, providing you have unlocked the WORKBENCH and have sufficient resources.
Settlements can be a pain if you don’t understand them, the game will give you a small Tutorial on looking after them so make sure you read it once you reach that point.
Each Settler you have at a Settlement, requires Food, Water, Defence and a Bed (under a roof). The more Settlers you have, the more resources are needed. This is a minimum requirement to keep any Settlement at 80 Happiness rating. The other 20 Happiness is affected by Stores.
Btw, 100 Happiness is required for a Trophy, but I will guide you through it.
Some Resources require assigning a Settler to them. Food and Stores for example need a Settler assigning to them in order to function. This is all done via the WORKSHOP HUD and the game will explain all this.
Once Settlements have Settlers living there, there are chances it can be attacked. Make sure you keep an eye out for on-screen notifications about these. However, the only 2 Settlements you need to take notice off, I will mention later in the guide, mainly due to the Fact that Attacks can lead to Happiness Rating dropping if not successfully prevented ASAP.
Combat
1 of the main Combat Systems in the game; V.A.T.S, will not be used if you are following this Guide. V.A.T.S just slows the game down too much and the game is so easy you don’t really need to bother with it.
You will just aim down the Sights or Hipfire, its really that simple!
Because of this, you will be using First Person View ONLY!
You will only use 2 Weapons throughout the game, the 10mm PISTOL initially and then the DELIVERER for the remainder once acquired. Before you collect the 10mm PISTOL, you will just Melee the enemies.
Because you are only using the DELIVERER, you only have to keep 10mm AMMO, making organising and looking for AMMO much much easier. Of course, GRENADES can be used and are actually helpful sometimes, but try and keep these for when absolutely neccessary.
FORGET about POWER ARMOUR, I only instruct to use it at 1 point in the guide, and again, thats because the game is to easy, its not needed.
AMMO is very easy to come across so theres no need to worry about conserving your AMMO, well, doesnt mean just completely waste it ;).
Also, Combat actions and Sprinting drain your AP Bar (Action Points), so keep an eye on this at all times.
Health
The game is perhaps most difficult early on, once you collect the DELIVERER and the BALLISTIC WEAVE mod, the game becomes stupidly easy.
You will always carry STIMPACKS and RADAWAY. STIMPACKS heal you and RADAWAY cures any Radiation you may have. The MEDIC Perk improves how much these heal, just keep an eye on your HP Bar.
don’t worry about ALCOHOL or DRUGS as we weren’t really be using them.
Companions
These are Allies that you will discover throughout the game and each provide various Bonuses.
Each Ally’s Affinity can be rasied by performing certain actions. They also provide some assistance in battle and improve your carrying capacity.
But compared to the Perk LONE WANDERER that gives you great bonuses if you travel alone, Companions are pretty much a waste of time. I only have you using a Companion intially due to related Trophies, once them Trophies are acquired, you will travel SOLO to benefit the LONE WANDERER Perk.
When you perform a action that a Companion likes/dislikes, you will receive a notification on the screen. Obviously, we want the likes and once you have received enough likes and spent enough time with that Companion, they will initiate a conversation. After the conversation, there Affinity will raise by 1, and after 3 or 4 initiated conversations, that Companion should reach Max Affinity (At which point you will earn the Trophy and now travel SOLO).
Just make sure when you receive a Persuasive Choice during a conversation option that you QS and reload until the Persuasion is successful. Sometimes selecting the Persuasion Choice during a coompanion affinity conversation, boosts your Affinity.
When your companion becomes downed, don’t bother about wasting a STIMPACK on them as they will Revive themselves after a short time.
The LONE WANDERER Perk seems to work with DOGMEAT as your Companion, bear this in mind and make sure you are still receiving the LONE WANDERER bonuses though as this could get patched.
You will gain Piper as a companion very early on, she is the Companion that you will reach Max Affinity with.
Vendors (selling/bartering)
Vendors are where you will require most your 10mm AMMO and is also where you will acquire most of your Caps from selling your unwanted Weapons/AMMO.
The more Charisma you have, the cheaper their prices will be and the more you can sell your items for.
The majority of the Vendors are located within DCM and you will make many visits to this place.
Vendors sell various stuff, with each Vendor having different stock. Some Vendors even have Quests for you.
Factions
There are a few Factions in this game, and some Quest choices can make another Faction Hostile! Even shooting at another Faction can make them Hostile.
We need to be on the goodside of most Factions in the game in order to receive certain Quests. Some do become Hostile at some point, but this is all explained in the guide.
DO NOT make any Factions Hostile until I advise, so NO shooting other Factions at any point. Enemies are normally always in Red anyway so its hard not to. If you ever do accidently shoot somebody you shouldnt, reload the previous QS.
Conversations
While talking to NPCs, sometimes you will be given a dialogue option with 4 choices to select. Each choice may result in a different outcome or a different conversation.
Sometimes a choice may be in Yellow,Orange or Red text. These are Persuasive choices and you may not always successfully Persuade. Having a high Charisma and using the QS feature will allow you to increase your chances.
But don’t worry about this as I will guide you through it.
Map/Warping/Compass
Any location can be warped to, as long as it has been discovered.
Warping is done via the Map which is viewed in your PIPBOY.
you also have a Compass on your HUD at the bottom beside the HP Bar. This Compass shows you where N,S,E,W are as well as Primary locations. The locations are shown as symbols/icons and are very helpful as they save you having to open your Map.
Keep this in mind as I will be referencing the Compass a lot.
Quest Markers
Almost any step or objective relating to a Quest will receive a Quest Marker.
My Guide, most the time will explain the route in detail and sometimes in not so great detail. It is be to used in conjunction with the Quest Markers that you will have. Even certain Settlers are Marked if their related to a Quest, the game is pretty good in this respect.
Quicksave/Hardsave/Autosave
Saving is very very helpful in this game. You can make a Quicksave at almost any point, even at a dialogue choice during a conversation that upon reload, takes you back to that exact same point in the conversation.
You will always have the Autosaves on, and you will make HSs and QSs quite a lot, but of course, I will tell you when.
The game cycles through 3 Autosaves everytime a Autosave is made, a QS always saves over the last QS and a HS always makes a complete new Save.
Make sure you always Save exactly when I tell you tell, this is very important.
NOTE
JUST PLEASE MAKE SURE YOU READ THE IN-GAME TUTORIALS ONCE YOU RECEIVE THEM IF THIS IS YOUR FIRST TIME PLAYING AS THEY WILL EXPLAIN MOST OF WHAT I HAVE SAID HERE PLUS MORE.


