Following my first attempt at creating any sort of gaming merch out of wood, I decided I would use the last of the wood I bought for the Windwaker shield, to make the Hylian shield. I kind of knew that I wasn’t quite ready for this either but I wasn’t going to get good without some kind of practice so I thought I would give it a go and next time, I would purchase some better material. Surprisingly though, this one actually went rather well.
Drawing the Design
The design was a little more tricky for this shield. It is not a flat shape, it sort of goes at a curve which makes carving out some of the parts more difficult. I figured out from the last time that I am too clumsy to make nice curves, but since these are all straight lines, I may be able to get this done without the same kinds of mistakes.
Using the same Sketch AR app that I used before. I was able to draw out the shape of the shield on the wood quite easily. With the help of a ruler, I was able to make this look pretty bang on. The design was set and now it was just a matter of cutting it without making a mess.
Cutting Out The Hylian Shield Shape
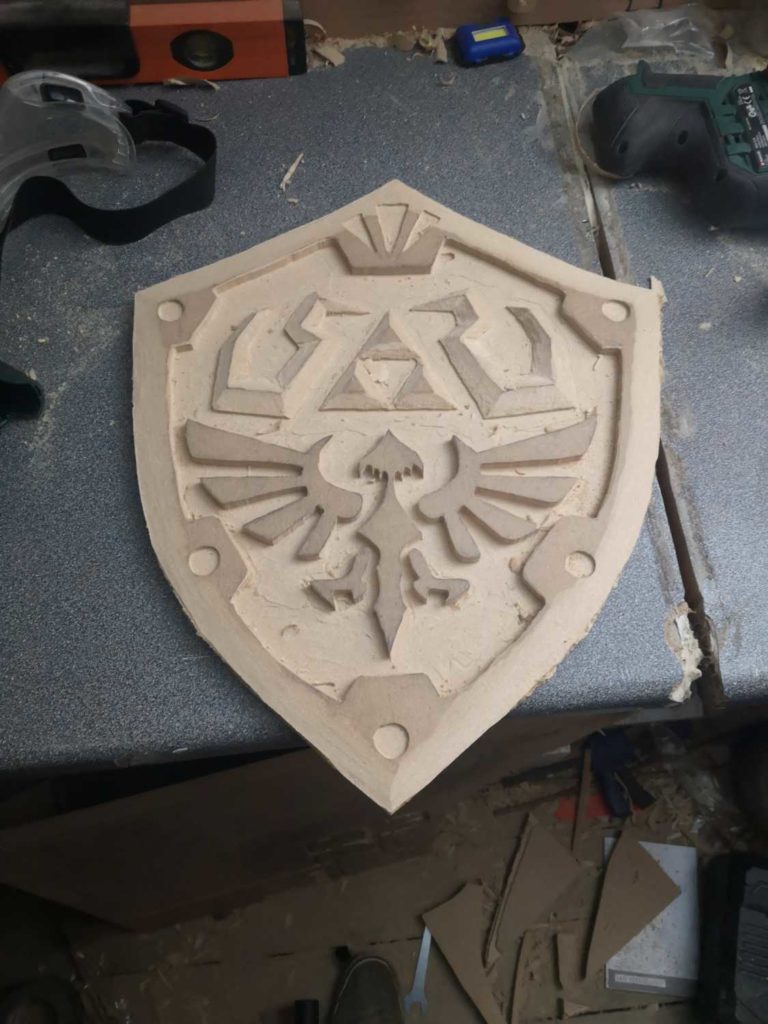
I learned my lesson from the last time and hit this one with the router straight away. I had purchased a 3mm cutting bit halfway through the last shield, and it was too late by then. The 3mm piece this time, however, was the silver bullet I think. This cut went incredibly well and I was able to cut quite deep into the material without many mistakes. After my first run with some cleanups, this was starting to look like the shield I wanted.
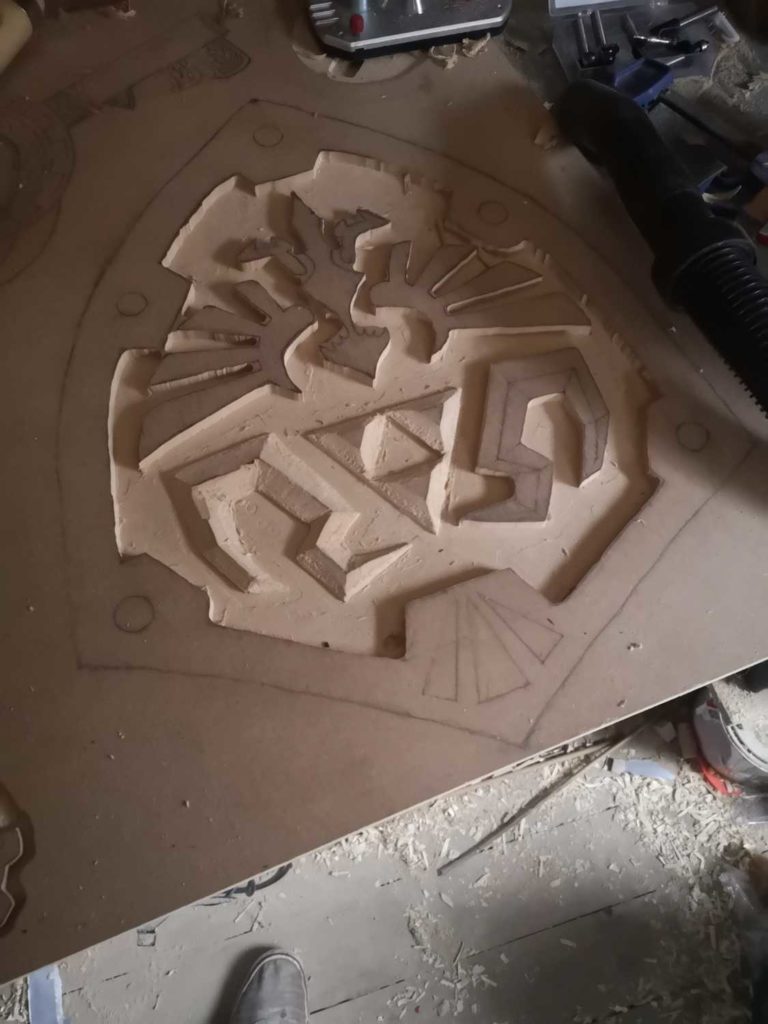
Once the router had done all of the heavy clearing work, I came in with a chisel and was able to cut out the finer details. All of the angles were easy to round off and without thinking things through fully in my head, it all seemed to fall together easily for me anyway. Once all the work with the chisel was done, it actually looked like the Hylian shield and looked much better than the last shield.
Starting the Finish
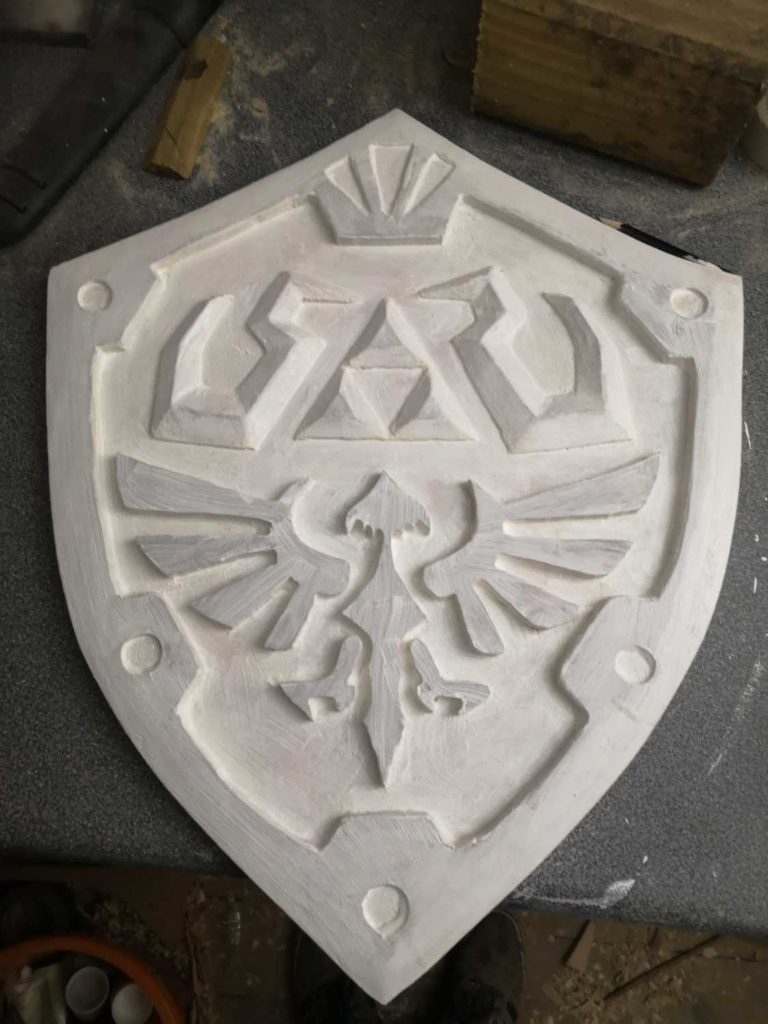
I was unhappy with how the MDF resulted in a sort of fluffy finish. I picked up some primer in the hope that a few coats of this would make a more firm surface to paint on. Once it had dried, I could sand it down and it would be much harder and easier to paint. A primer seems like a good idea in general, So I didn’t see much wrong that could happen with this.
Painting the Classic Zelda Colors
The priming didn’t go too bad. Light sand seemed to leave the finish looking as I hoped it would. One problem I did not consider was how to sand inside the areas of detail. I tried my best but it was difficult to smoothen out all of the brush strokes. It took some effort but the shield was ready to paint.
Since the red and blue used are pretty much the primary colours, I didn’t have to deal with much mixing here. I was able to get stuck right into the painting and everything came together really well.
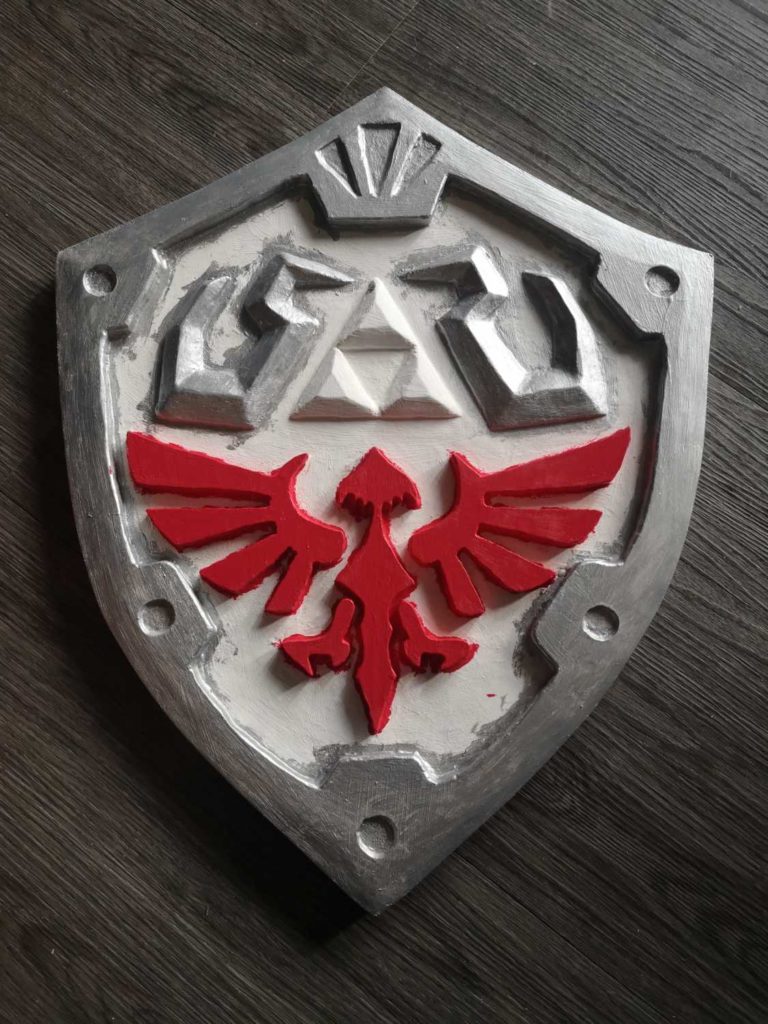
After painting the red I felt like something was a bit off. After some thinking, I felt that the area was protruding far too high and I had to use a chisel to cut away a large amount of this so that it was much lower into the surface of the shield. I had to use some primer again and then repaint. My sloppy hand was unable to do this well either so ended up having to do a lot of touch-ups on the blue.
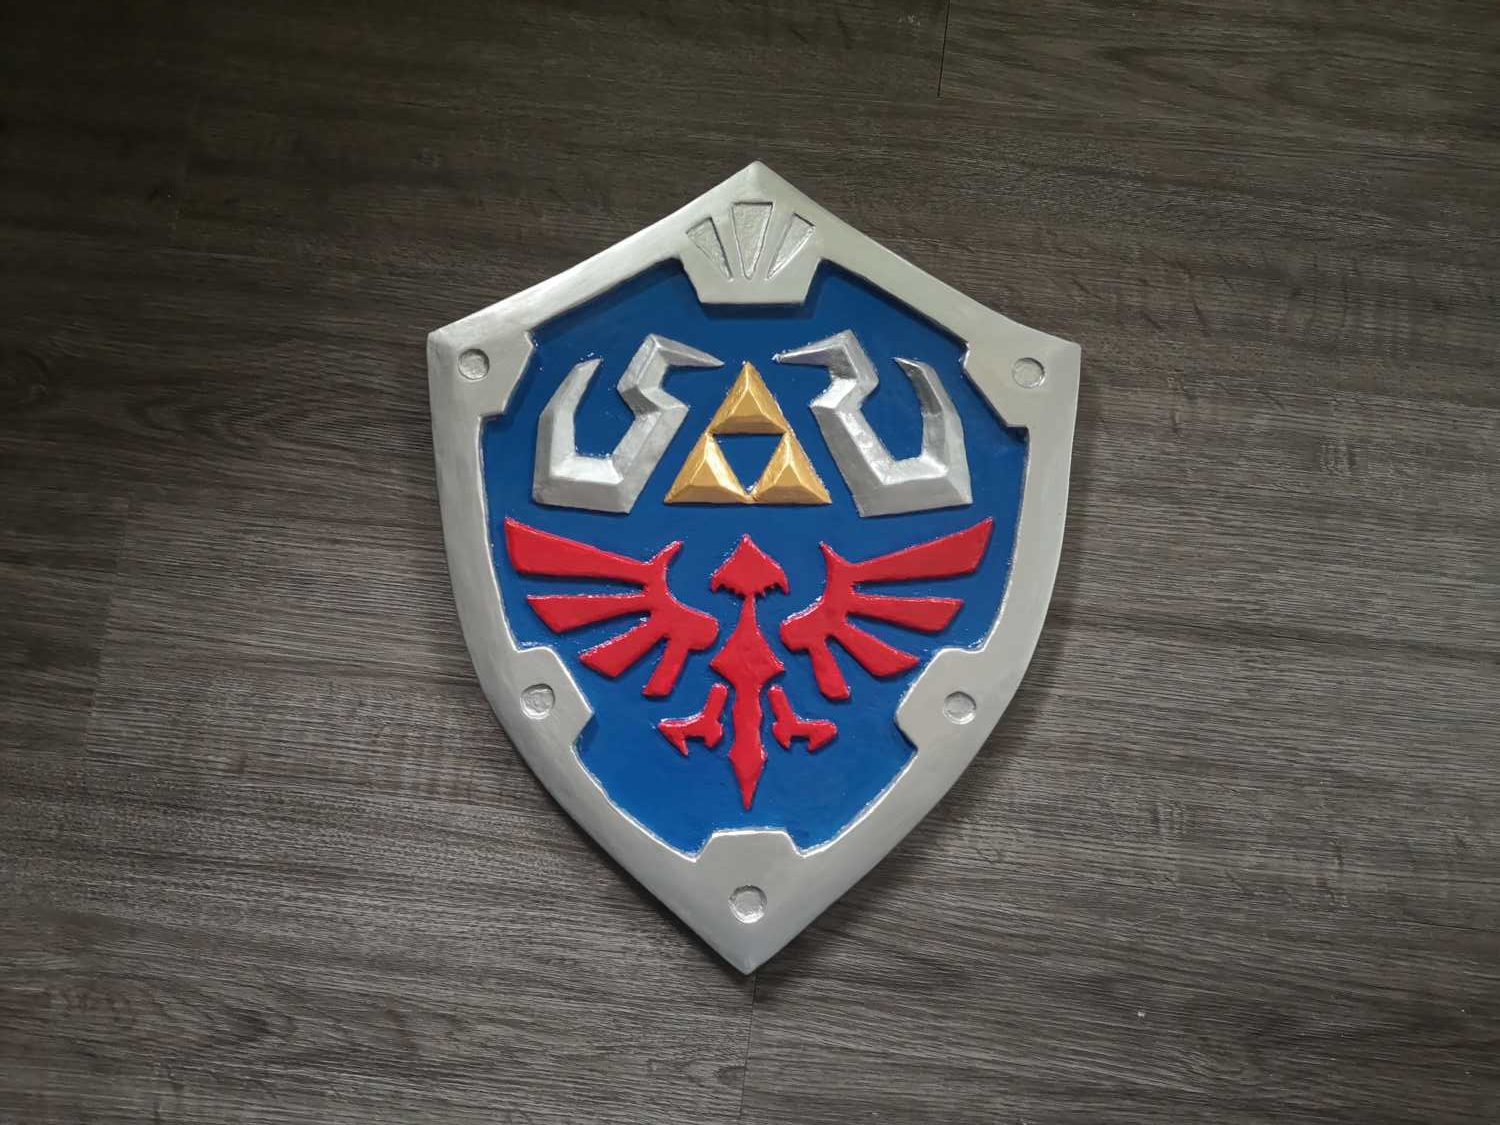
The finished product actually turned out way better than I had expected. I am still not 100% happy with it and feel as though I could do this way better if I had of used a piece of pine. I may revisit this shield again in the future. For now, at least, I was left with one final decision. To leave it with a matt, painted finish or to spray it with a coat of varnish.
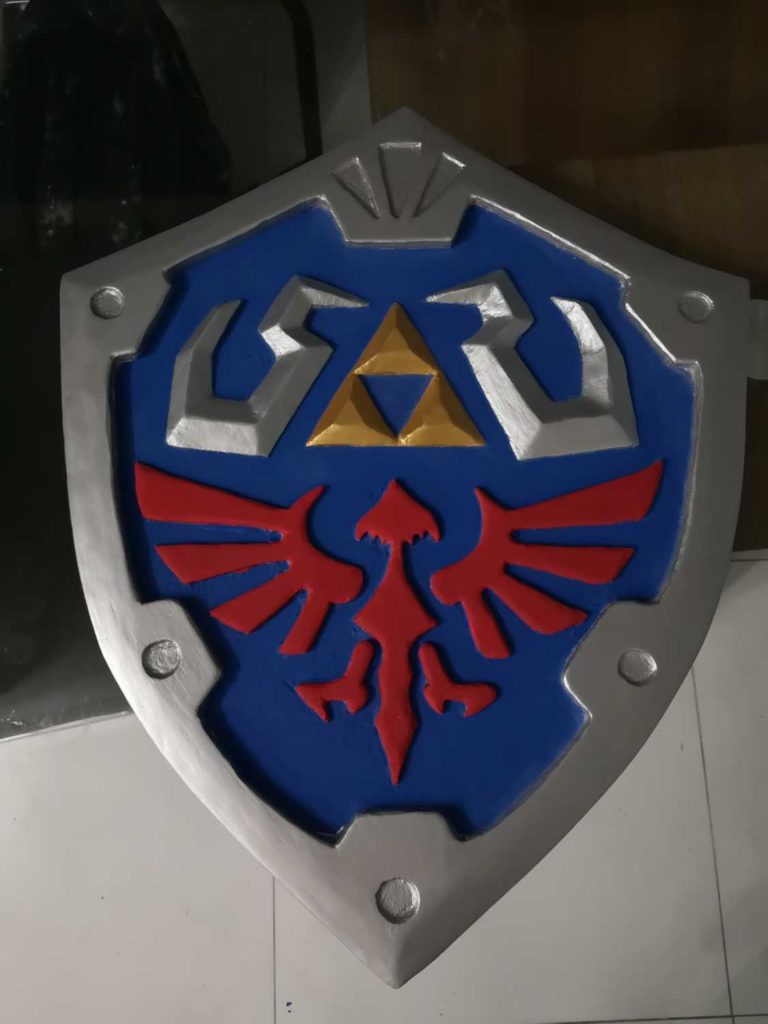
I decided to spray it in the end. The Hylian shield is meant to be made of metal and should have a natural metallic gloss. At least to the surrounding metal part of it. The gloss definitely improved it in some ways but it also highlighted some of the imperfections. The gloss has its pros and cons I suppose. I can take this as another lesson learned. Anyway, after twice the amount of hours it took to complete the Windwaker shield, here is the finished product.