I recently got a small workshed set up in the back garden and decided to start making use of it. Since gaming merch can often be expensive and hard to find, I decided I would have a crack at making a few things myself. I wouldn’t be the most artistic person in the world, nor am I particularly skilled in wood carving. I decided to start off easy and go with the shield from the Windwaker as my first project.
I have always been a huge fan of Zelda. The Hylian shield is obviously the most iconic shield in the series but I had no idea whether this would even work out well. If it did work out well, I was fairly sure there would be a lot of mistakes that I would make that I will eventually be unhappy with and not be able to ignore.
The design of the shield from the Windwaker is a little more easy and basic so this was my reason for attempting this as my first project. Here is how it went.
Drawing the Wind Waker Shield Design
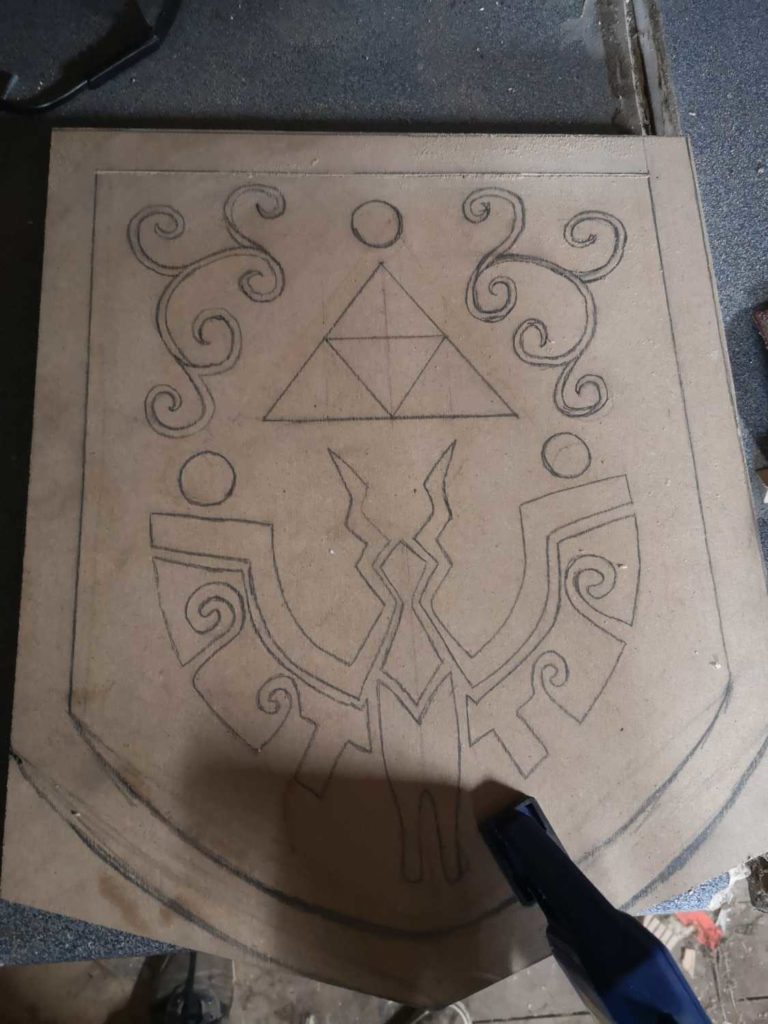
So, here was the first hurdle. I am off to a great start! I suck at freehand drawing and I do not have a printer or access to anything that will allow me to make some kind of a stencil. So the question now is how to sketch out the design of the shield?
I thought a projector would be an awesome solution. Some guides online showing how to make one using a phone and a magnifying glass in a box. This actually worked quite well but it was still not ideal as i want to draw on a flat surface and not have to hold it up against the wall.
The solution was to use an app called Sketch IO. It allows you to paste an image over a camera feed. I was able to place the phone above the wood and look at what i was drawing through the phone screen to trace around the shape to create the design. To my surprise, it worked quite well.
Cutting Out The Shield Detail
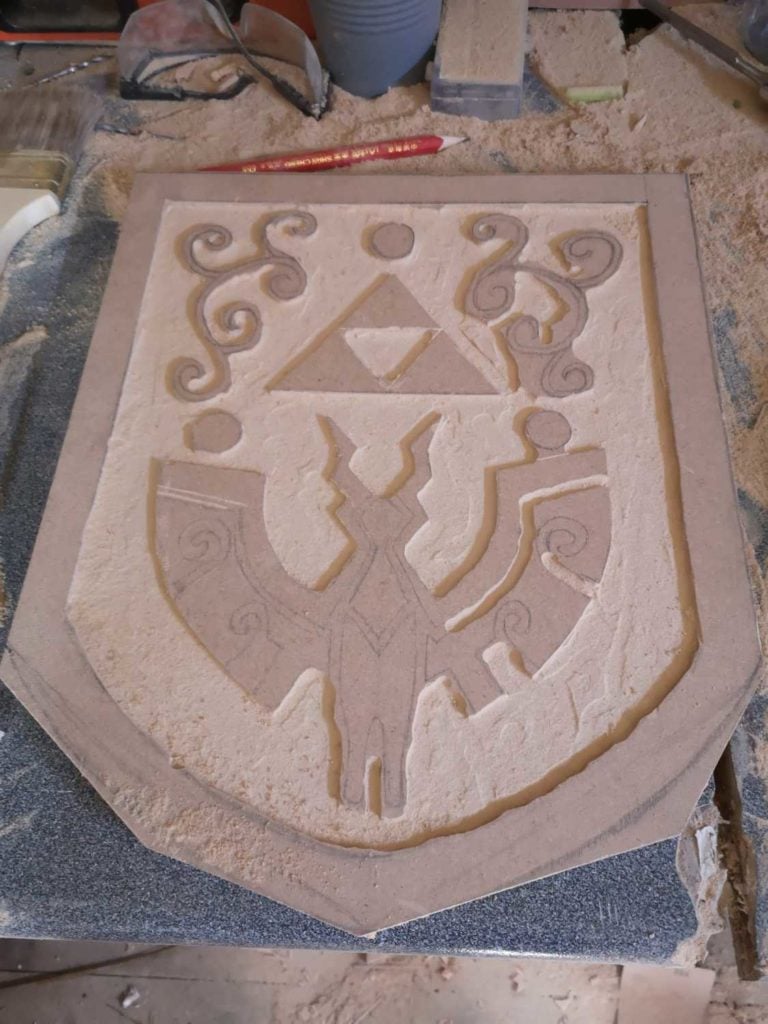
The idea of hand carving something is quite attractive and it was what I had intended on doing. I had some chisels for this and thought it would be a walk in the park considering this was MDF. Hurdle number 2!
So the chisel was not making a dent in this material. I was making some progress but an injury was definitely going to happen. Even if I didn’t injure myself, I was putting so much force on the chisel that if it eventually slipped, It would destroy a lot of the carving work that I had done.
The solution was to abandon the hand-carved title. I got myself a small router and this did a fantastic job at cutting out the majority of the material. It is clear to see from the result that this is my first time ever using a router. Already, I am unhappy with some of the detail on the swirls. My hand was not steady enough and I think the bit I used was too big. I did buy a smaller one after this but it is obviously too late now!
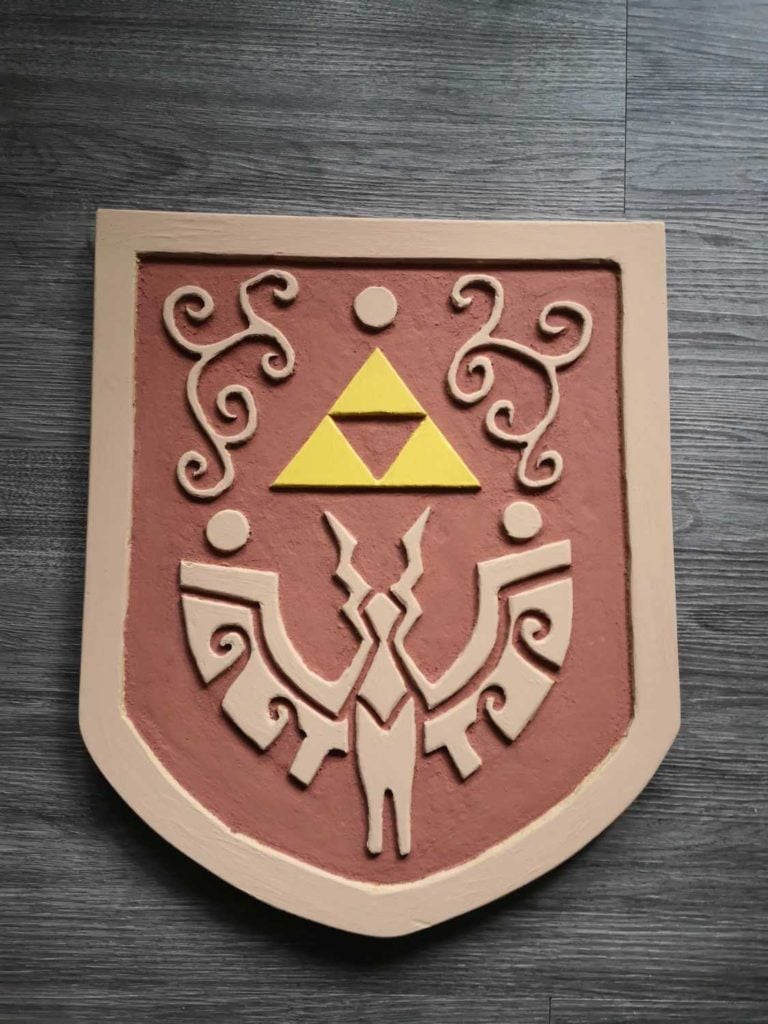
Painting The Wind Waker Shield
It was at this point that I regretted using MDF. The finish is pretty ugly and I can’t take advantage of the woods natural colour to make up some of the colours of the shield. I also had to deal with a bit of a fluffy finish. I had assumed with a heavy coat of paint, would fix this a bit.
I picked up some acrylic paints which had some colours that matched the colours the shield uses. They did not match perfectly but I was able to do a bit of mixing to get it right. After some painting, the shield came out ok.
I am only really posting this as a first attempt to sort of chart the journey and can look back at how bad this is in a few months. I feel this looks fairly bad already. The swirls do not look good and the symmetry is off a bit in general. I could definitely do this better if I did it again but for now, this is the finished project. Perhaps the colour scheme of the Hylian shield will make this a good choice to go for now.