There are several reasons why you might want to set a static IP on the Xbox One console. The most common reason is for those who are looking to setup port forwarding on their console in order to correct a strict NAT type. If you are looking to setup a static IP on Xbox One, this guide will help you achieve it. The process is quick and simple.
What Is A Static IP?
You can read more about this here, but the short version is that when your Xbox connects to the network, it gets an IP address automatically. This will often be different every time. When you set the IP to static, your Xbox will use the exact same IP every time. This allows you to configure some rules in your router, like port forwarding and you will not have to change anything the next time you connect to the internet.
Set Static IP On Xbox
To set a static IP on the Xbox One, you will need to navigate to the network settings of the console. This can be found under the following navigation tree from the consoles setting menu.
General -> Network Settings -> Advanced Settings -> IP settings

Select IP Settings -> Manual
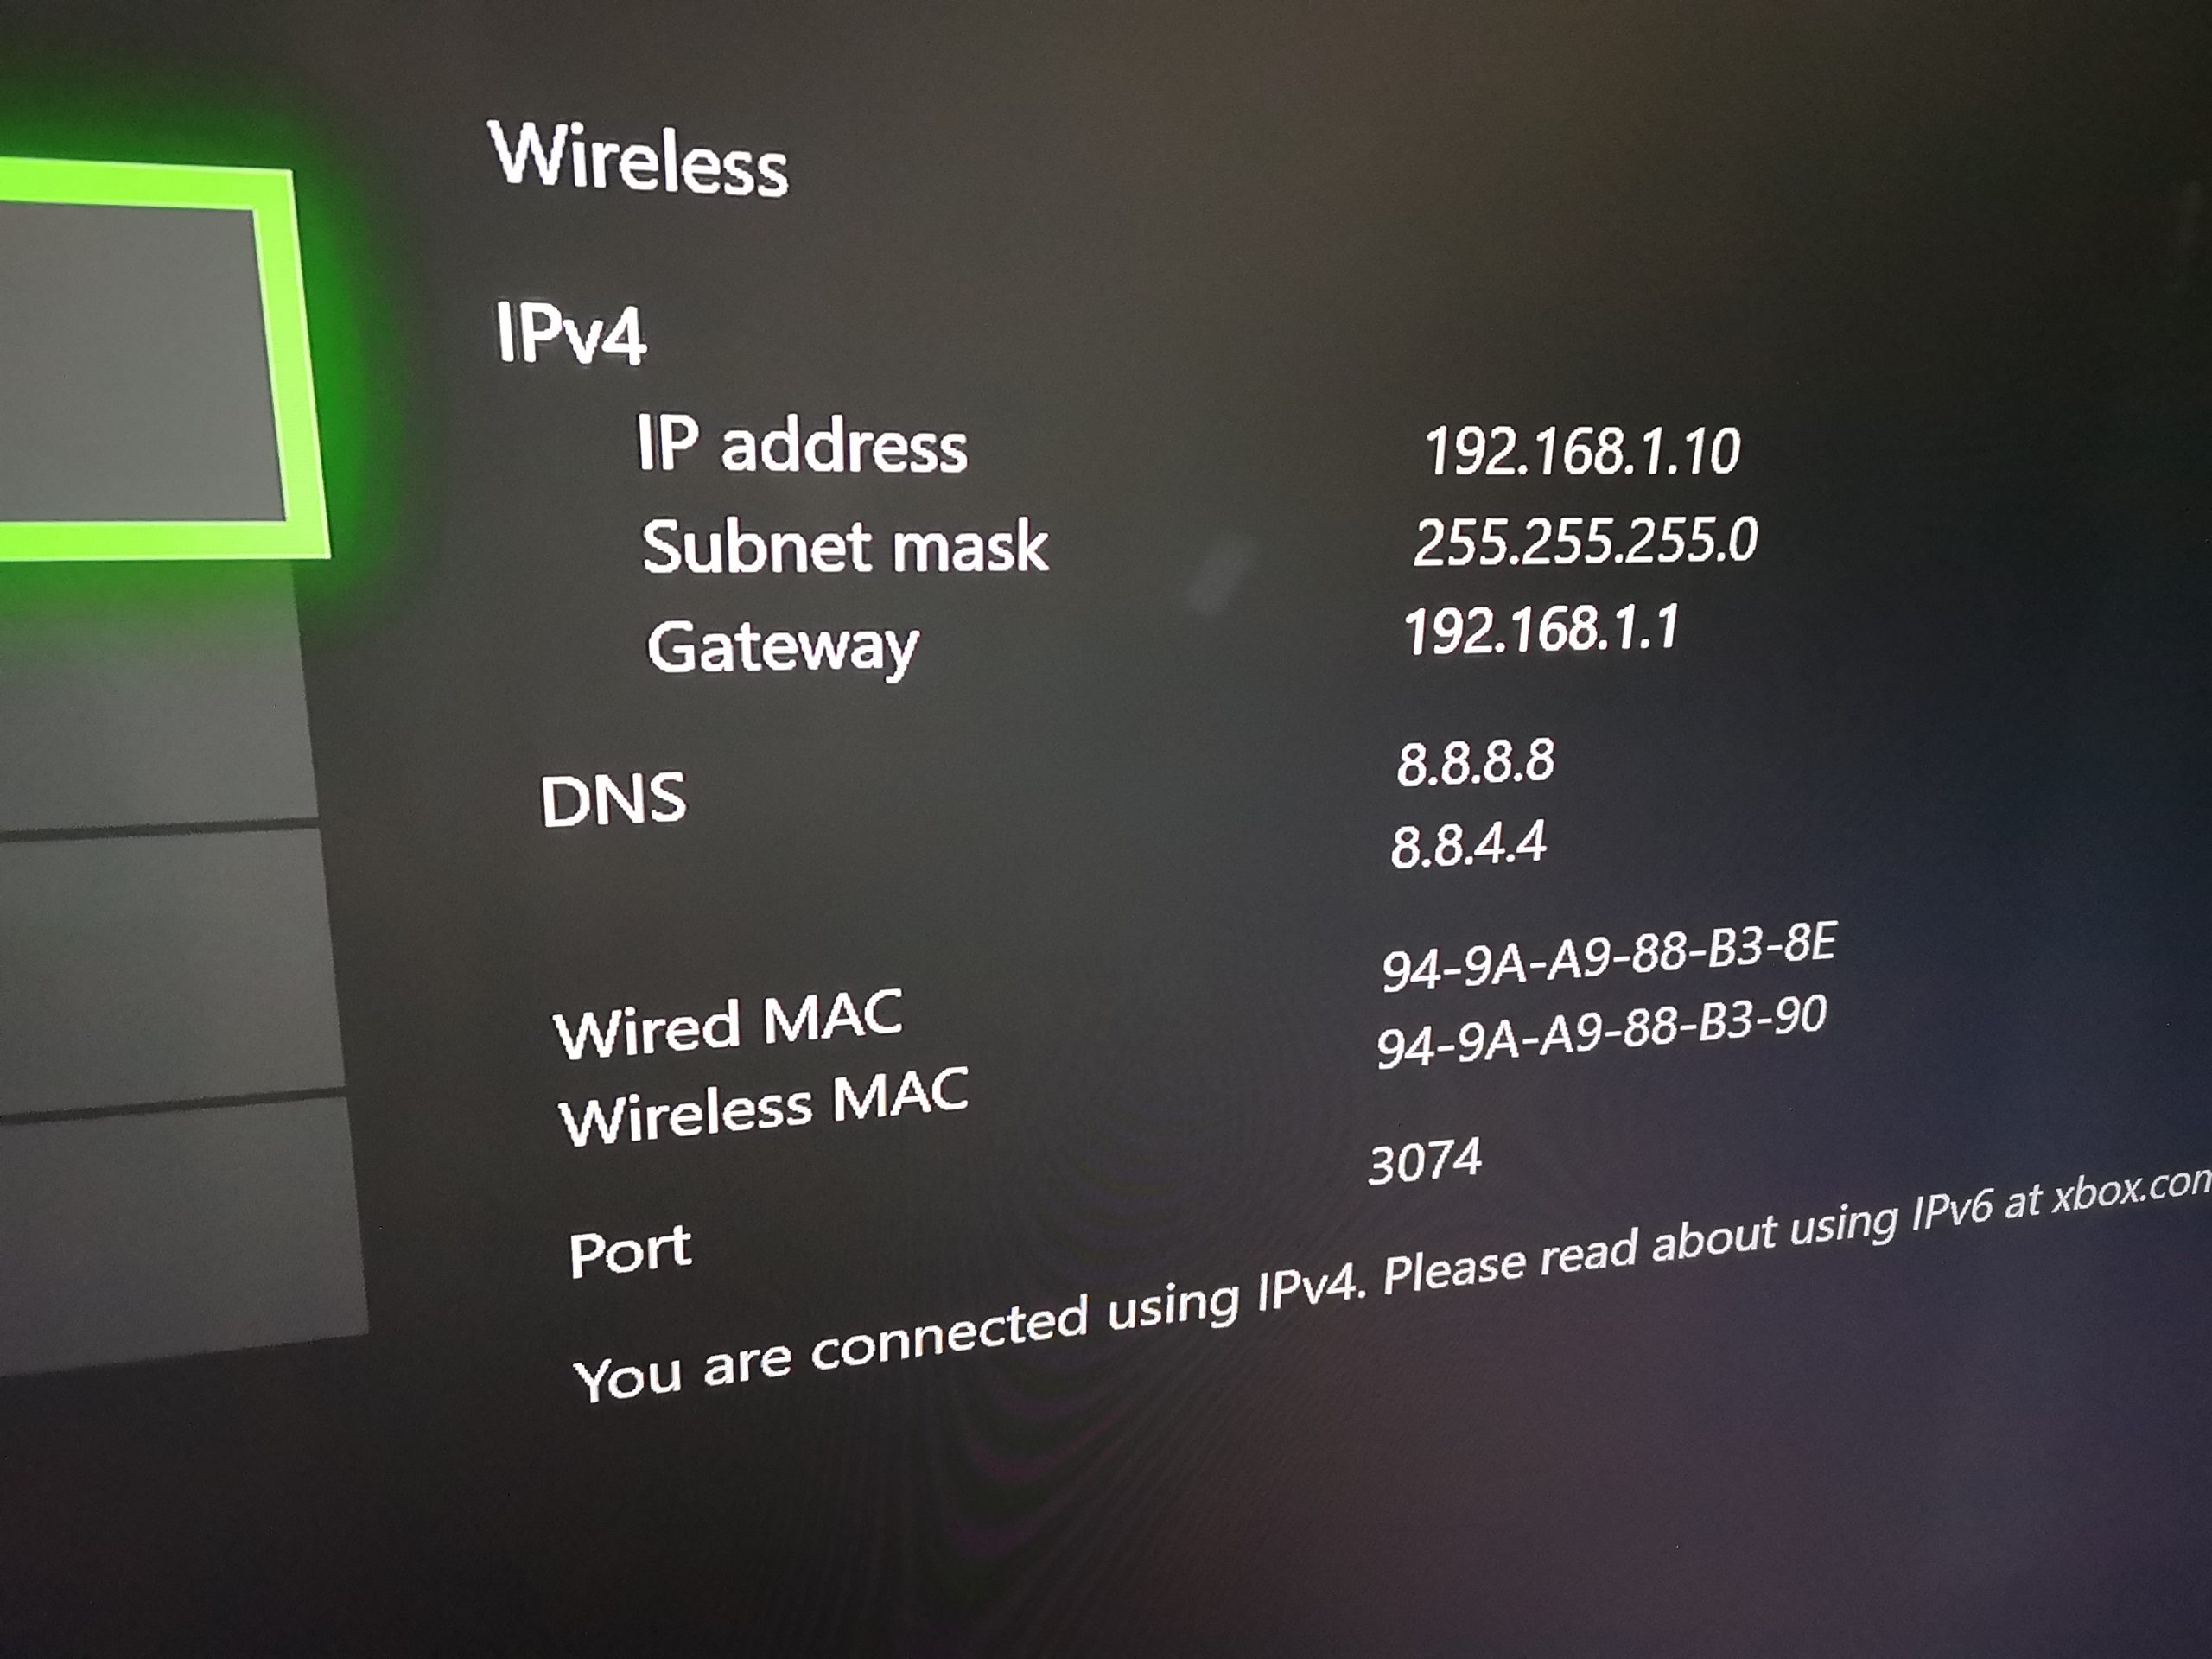
Once you select this, the Xbox will guide you through a wizard of setting the various values. The most important here is the first IPV4 value. I would suggest you change this to something a bit higher than what it currently is. In my example above, I have an IP address of 192.168.1.10. I would suggest you change this to something like 192.168.1.150. This way it is unlikely to end with an IP address conflict.
Once this process is complete, the Xbox will check if it can connect to the internet. If you entered everything correctly, you should now be using a static IP!


