Having built a wooden deck in the back garden, I found myself with 3 or 4 large wooden posts leftover with nothing to use them on. I do not currently own a lathe to do any fancy woodturning with, so I tried to see if I could cut these into cubes or larger rectangles in order to carve some kind of gaming-related item out of them. My first project was a mushroom from the Mario franchise.
Up until this point, All of the wood carving work I had done as part of my gaming DIY sessions had been on a flat surface. Carving a 3d pattern into a flat surface is tricky, but not too bad since you are still only relying on a 2d perspective. Symmetry has always been my downfall and having to carve a full 3D model that was reasonably symmetrical was definitely going to be my biggest challenge.
My tools for this project changes slightly. I picked up a set of whittling knives online and decided to take a more classic approach to this. I cut out a cube of timber and I got to work carving out the shape of the mushroom.
Whittled Super Mario Mushroom
Whittling is completely new to me. I have worked with some wood carving in the past but never anything this large and almost always more simple 2d carvings. Whittling seems like the best road to take since I can use a knife to cut the wood to shape without having to rely on a vice or anything to clamp the wood down while I cut into it.
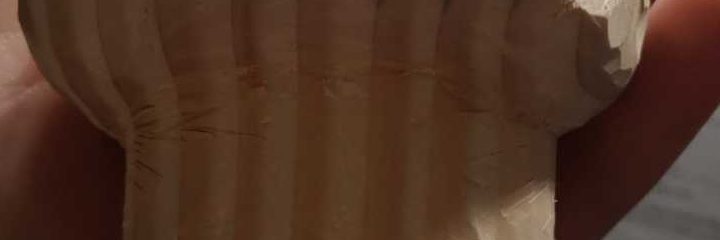
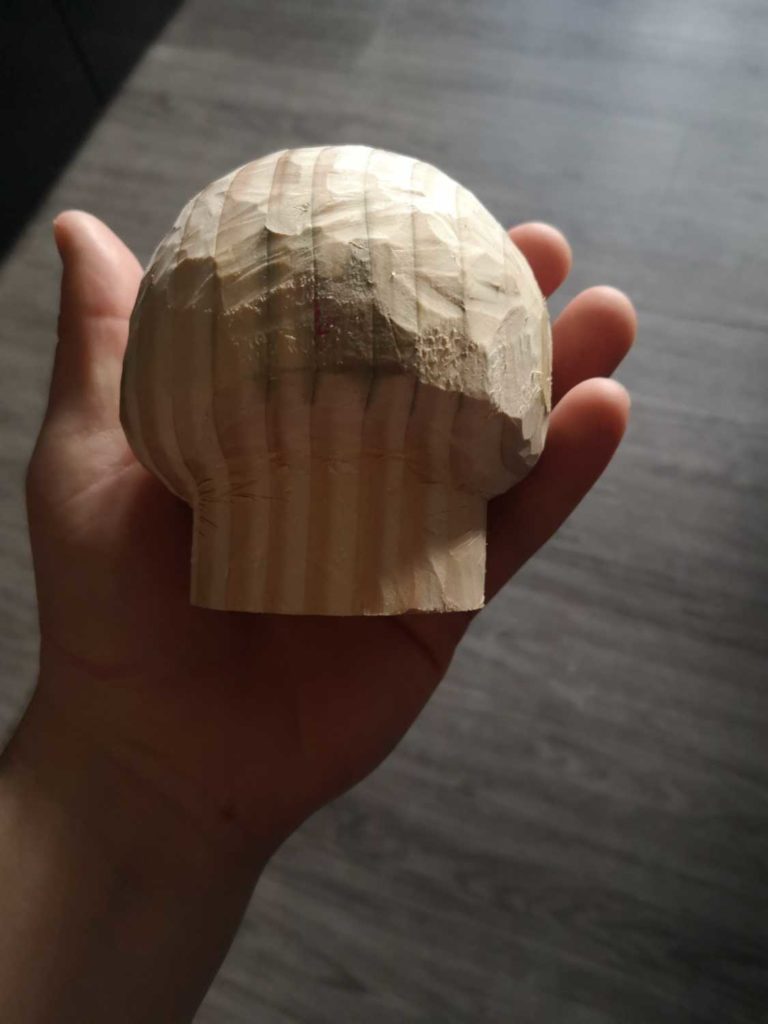
The wooden poles are solid pieces of pine. Great in some ways as pine is soft but the grain is also a bit uneven on pine with knots being the devil! My cheap Amazon whittling knives did struggle with the knots but with some persistence and care, I was able to carve the main dome of the mushroom head. It was looking really good!
Epic Muscle Pain!
I really worked hard on this the first day. I spend several hours cutting the mushroom to shape. My hands the next day were in bits. It took some serious warmups before I could even clench my fist. My grip strength isn’t bad but I don’t have much need to spend hours a day gripping onto something so tight (I know this sounds like filth).
This was a shock to my muscles so I had to take a break for a day. Once I had recovered I was able to get back to business. This time, wearing gloves to help get a better grip without having to hold so tight.
Cutting The Mushroom Stem
This was the hardest part of the mushroom to cut. There is such a steep angle where the stem joins the head of the mushroom. I had to spend quite a lot of time making precise cuts by slicing the knife like I was cutting steak rather than the standard action for whittling. There were a few moments where I was worried about losing a finger or at least getting a nasty cut. Few small nicks here and there but nothing major. I made it through in one piece, or at least my hand did.
One harder part about this was actually making the curve look right. If the angles were too sharp, it made the mushroom look weird. Making them too wide and it lost the detail that this was the stem of the mushroom. The curves are very smooth for this and getting them right was a tough balance to get right.
I approached this by taking very small amounts off at a time and then taking a look from a distance to catch the exact moment when it was just right. I may have overcut just a bit when it comes to the bit around the eyes but I didn’t really notice it until I carved a second one (ill get to that a little further down).
To Sand or Not To Sand?
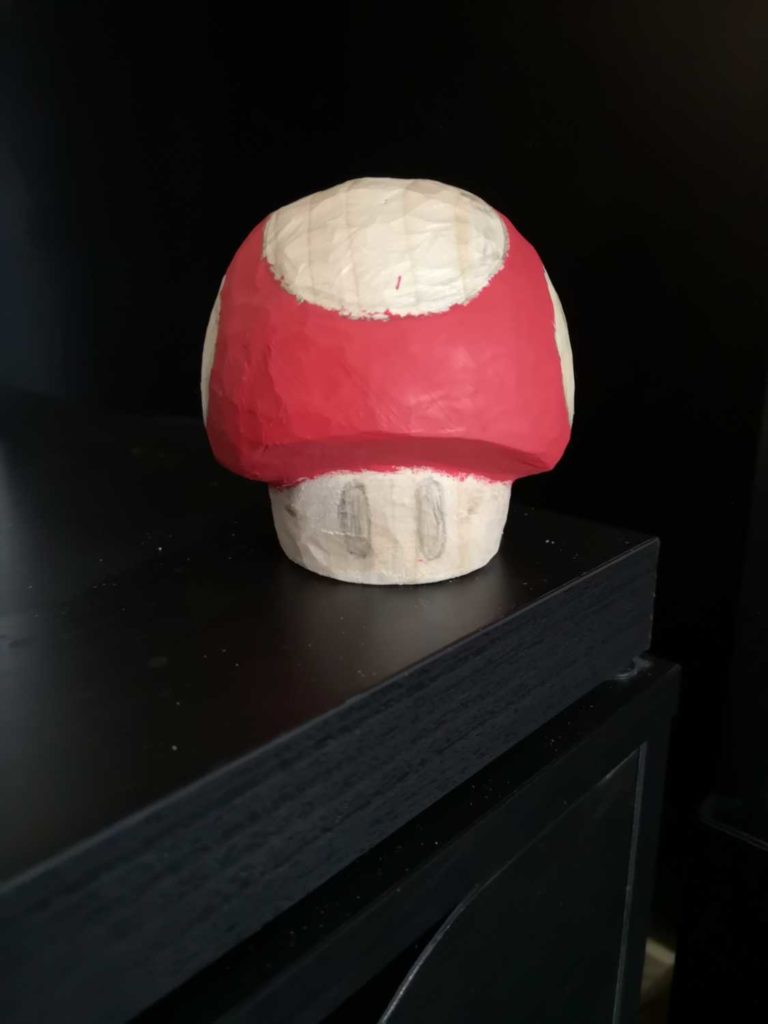
Once the job was done, the head of the mushroom was rough but not in the way it was for any of the previous carvings. You could see clear angles where the knife had cut away the wood. Part of me kind of liked it. It makes the mushroom look more like it was actually made from wood. I could either sand it down to make it smooth or try and fix it up a bit to emphasize the carving marks. I decided to go for the latter.
I still had to do some sanding here and there to get rid of any scuffs and mistakes but overall, I was able to round it out quite evenly by making some clean cuts to get rid of the parts that I didn’t want.
For the stem, the cuts were not so well defined and due to the issues I had above, I decided to sand down to stem to make it more rounded and smooth. There were far to many slice marks from the knife that I couldn’t fix with more knife cuts. I had to use sandpaper to get rid of them. Once they were removed, I had no choice but to remove it all.
Once the stem was sanded down, I came up with an idea. What If I just left the stem the natural wood colour. Mushroom stems are a whitish/yellow colour, not a million miles away from the natural colour of pine. This made it the perfect compromise now. I got to keep the whittling marks on the head and got to keep some wood grain on the stem.
Painting The Mushroom
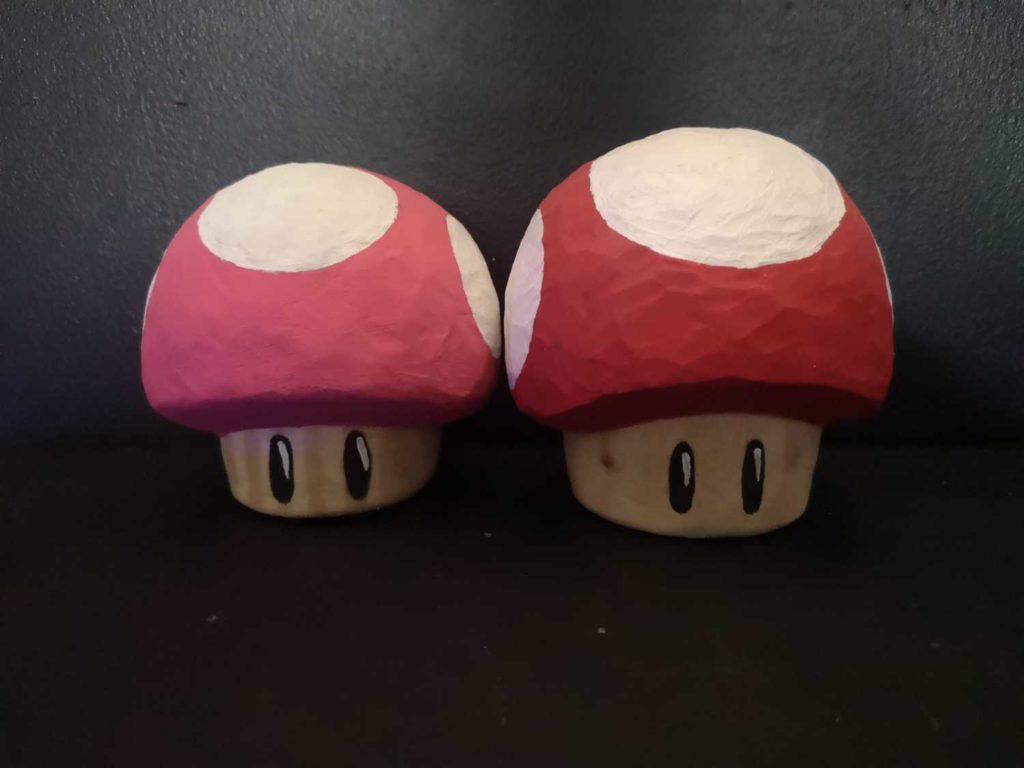
There was no doubt that this mushroom was going to be red. Although there are many other colours that have shown up over the years, the red mushroom is by far the most iconic. So I picked up my compass, drew some circles for the white spots and got painting.
As always, my painting skills suck but since this is a fairly basic design, it all came together nicely. The final touch was a drop of white in the eye which turned it into a slightly off, funko pop looking face to a face that looked a lot like the actual mushroom from the Mario games.
Making A Second Mushroom
After creating the first mushroom, my girlfriend stole it because she liked it so much. Since I too liked it, I decided to create a second one for her, this time in pink. Considering how much effort it took me to create the first, I was surprised by how quickly I was able to get a second mushroom created.
Not only was this one much quicker to make, I really feel the design was far superior to the first. I can’t say whether this was pure luck or whether I had learned a bit from the first one. The only way to find out is to create a third mushroom right? Green maybe?